Backlog
Plan and prioritize upcoming work before it moves into your team’s workflow.
The Backlog lists all items in your team’s 'To do' workflow step, beyond the 20 that appear in In progress. It’s designed for planning—a dedicated space where product owners and team leads can review, organize, and prioritize what’s next.
How Backlog and In progress work togetherThe Backlog lists all items in a team’s 'To do' step for planning and prioritization. Only the 20 most recent 'To do' items appear in In progress, where the team tracks active work.
What's included
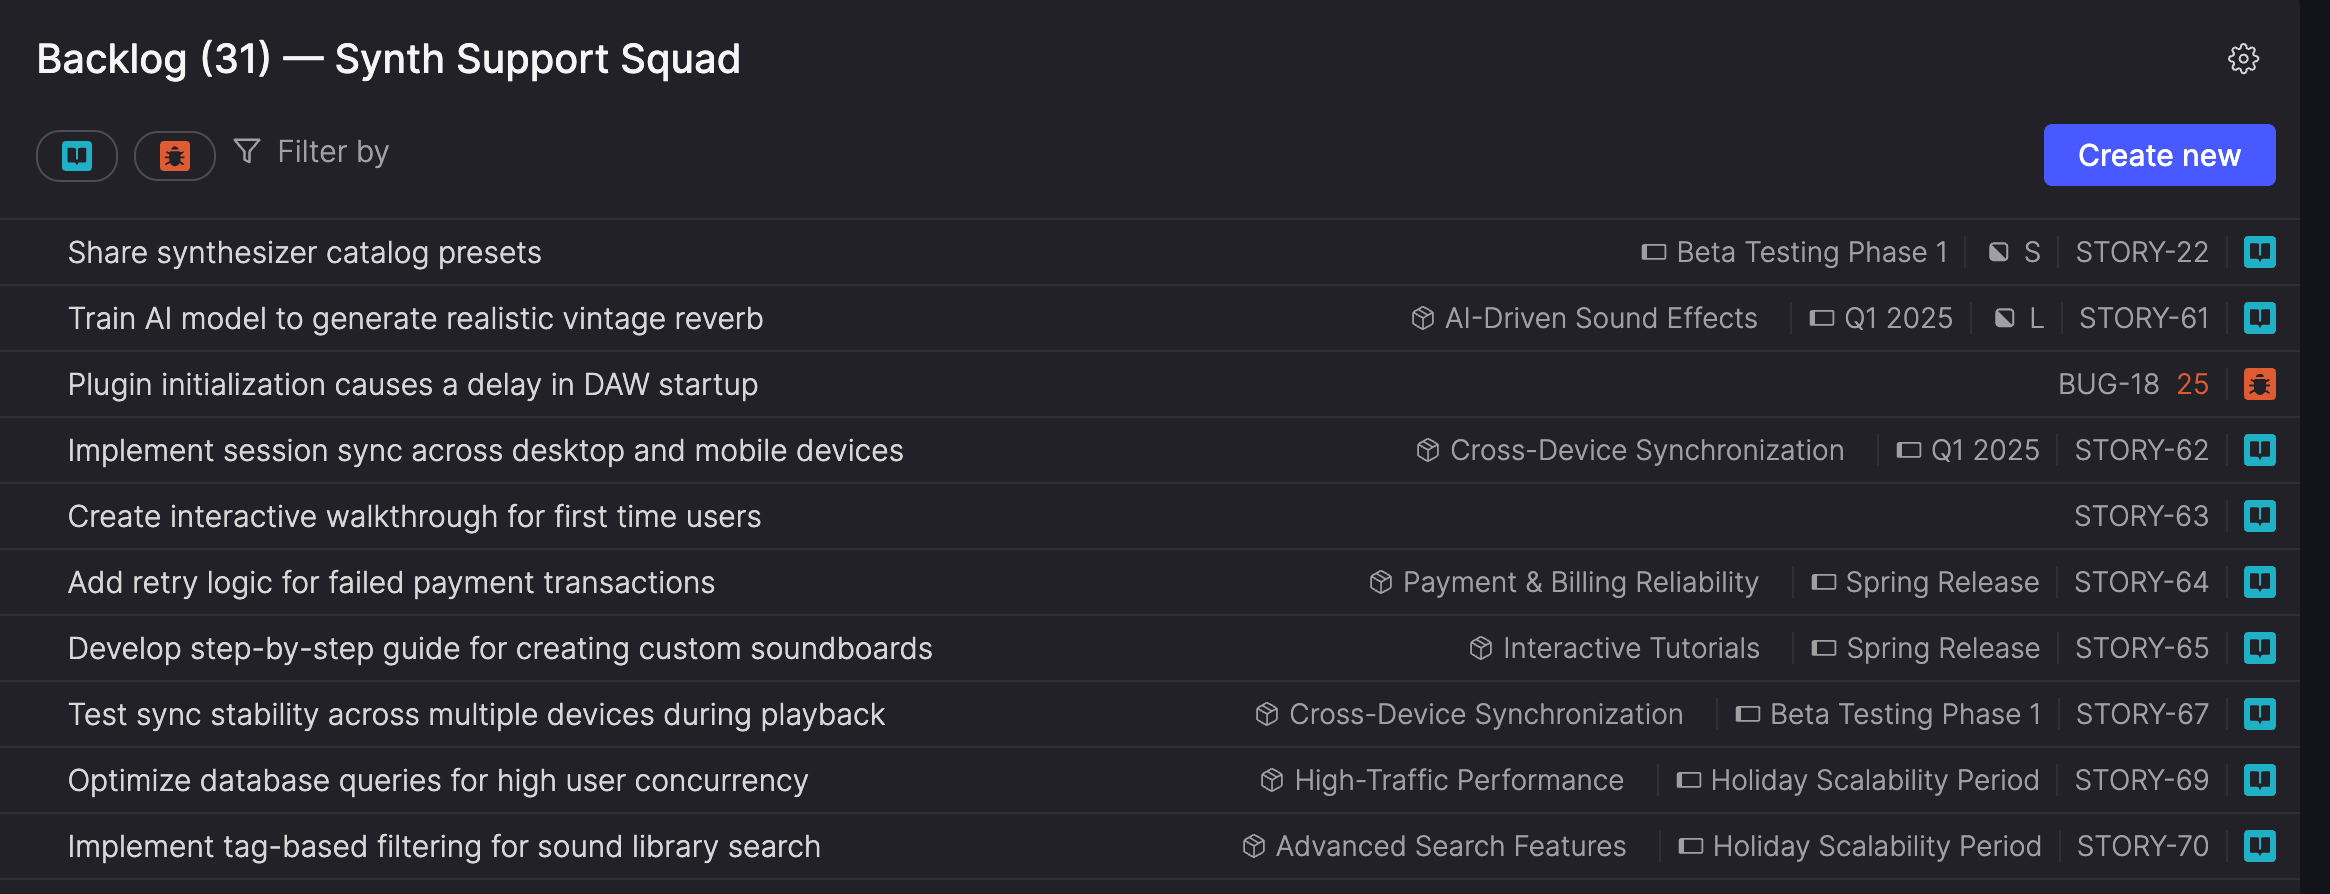
The backlog lists all stories and bugs in your team’s 'To do' workflow step. Each item shows key details, such as:
- Item type and ID
- Title
- Optional settings (for more details, see Backlog settings):
- Estimated completion dates
- Product themes
- Pull requests (requires the GitHub integration)
- Risk rating (bugs only)
- Story size (stories only)
- Timeboxes
Click any item to view its full details.
Backlog visibilityOnly items in the team's 'To do' workflow step appear in the backlog. Items in other steps in a team's workflow are shown in In progress.
Access the backlog
You can open a team’s backlog from the Your teams section of the sidebar.
- Click a team name to expand its menu.
- Select Backlog to open the planning page for that team.
A separate team icon next to the team’s name opens the Team overview, where you can see members, stakeholders, and other administrative information.
Backlog settings
You can choose which item details to display in the list.
- Click the Settings (gear icon) menu in the header.
- Select or clear the checkboxes to control what's displayed:
- Estimated completion dates – when each story or bug is expected to be done.
- Product themes – which product theme each item belongs to.
- Pull requests – any linked GitHub pull requests (requires the GitHub integration).
- Risk rating – the bug's risk on a scale of 1 to 25, with 25 representing the highest risk
- Story size – the story's estimated shirt size, from XXS to XXL.
- Timeboxes – which timebox the item is included in.
Manage the backlog
The backlog is the foundation of your team’s planning process. Managing it effectively ensures work stays organized, prioritized, and aligned with your team’s goals. From filtering and reordering items to adding new stories or reassigning work, the backlog gives you full control over what’s coming next.
Filter the backlog
Use filters to narrow the backlog to items that match specific criteria, such as ownership, timebox, or update date. Filtering helps you focus on work that’s ready for planning or review.
- Use the icons at the top of the page to choose whether to show Stories, Bugs, or both. At least one must be selected to display any items.
- Click Filter by at the top of the backlog.
- Select one of the available filters and fill in any required details.
- Click Done.
- Repeat steps 2-4 to add additional filters as needed.
The list updates to display only items matching criteria from all filters.
For multi-select filters, items matching any of the selected values are included. For example, using the Assignee filter to select more than one user includes items assigned to either user.
Active filters appear at the top of the backlog.
To remove a filter, click the X on the filter tag or adjust the filter settings.
Available filters
| Filter | Description |
|---|---|
| Assignee | Filter by the user the item is assigned to, or 'No assignee'. |
| Timebox | Show items within selected timeboxes, or 'No timebox'. |
| Created* | Set a date and time range for when items were created. |
| Last updated* | Set a date and time range for when items were last updated. |
*When using the Created andLast updated filters, you can specify absolute or relative date ranges and include the time of day to narrow your search further. For details, see Filtering by date and time.
Reorder items
Reorder items in the backlog to set their priority. The order of items in the backlog determines how they appear in the 'To do' section of In progress.
- Drag an item up or down the list to change its position.
- Right-click an item and choose Move item to top to bring it back into view in In progress.
Changes are saved automatically as you reorder.
You can’t reorder items while filters are applied. Clear filters first to adjust priority.
Right-click for more actions
Right-click any item in the list to open quick actions for planning and prioritization. These include:
- Create before - create a new item directly before the selected item.
- Create after - create a new item directly after the selected item.
- Move to top - move the selected item to the top if its workflow step.
- Duplicate - create a copy of the item, including its title, description, and other details.
- Delete - permanently remove the item from your workspace (confirmation required).
Add items to the backlog
You can add work to a team's backlog by creating new items there or assigning existing items to the team.
When you assign an item to a team without choosing a workflow step, Atono automatically adds it to the bottom of the team's backlog ('To do' step).
For teams with backlog management enabled, only the team's backlog owners can add stories to the backlog. Team members can create and manage bugs regardless of the Backlog management setting.
Create new items on the backlog
- At the top of the backlog, click Create new.
- Choose Story or Bug.
- Fill out the details in the draft editor and then click Create. The new item appears at the bottom of the backlog.
There are also a few shortcuts for adding stories:
- Add to the top of the backlog: Hover at the top of the backlog until the quick-add bar appears, then click the + icon to create a story at the top of the backlog.
- Add before or after an item: Right click any item in the backlog and choose Create before or Create after to insert a new story in that position.
Assign existing items to the backlog
You can move an existing item in Atono to a team's backlog. For example, from Story refinement, Bug triage, or even another team.
- Open the item.
- In the details panel, click the Team field.
- Choose the team and confirm.
The item appears in that team's backlog, ready for planning and prioritization.
Remove or reassign items
Reassigning items helps ensure the right team owns the work. Move stories or bugs to another team’s backlog when priorities shift or ownership changes.
If the destination team has backlog management enabled, you must have the backlog owner role on that team to assign a story to it.
If an item no longer belongs to a team, you can remove it from the backlog.
Remove an item from a backlog
- Open the item and click the team name in the side panel.
- Select No team.
- In the Unassign from team dialog, confirm by clicking Unassign from team, or X to cancel.
Bugs unassigned to a team appear in Bug triage, while stories unassigned a team move to Story refinement. This ensures they remain visible and ready for reassignment.
If you want to permanently remove an item from the workspace, you can delete it.
Assign an item to a different backlog
- Open the item and click the team name in the side panel.
- Select a new team.
- Confirm your choice by clicking Change backlog.
Reset size estimatesWhen reassigning a story, the original team's size estimate is removed. This allows the new team to resize it based on their own processes and capacity, ensuring accurate planning.
Updated 3 months ago