Home
Your starting point of managing your work, users, teams, and integrations.
Your Home page is the launchpad for your Atono experience. From here, you can invite users, create teams, connect to Slack, and keep an eye on the items assigned to you. You can also customize your Home page with widgets that surface views of stories and bugs from across your workspace.
Invite users
Ready to bring new folks on board? You can invite others to join your workspace directly from your Home page.
- Click Invite users.
- Enter the email addresses of the people you want to invite.
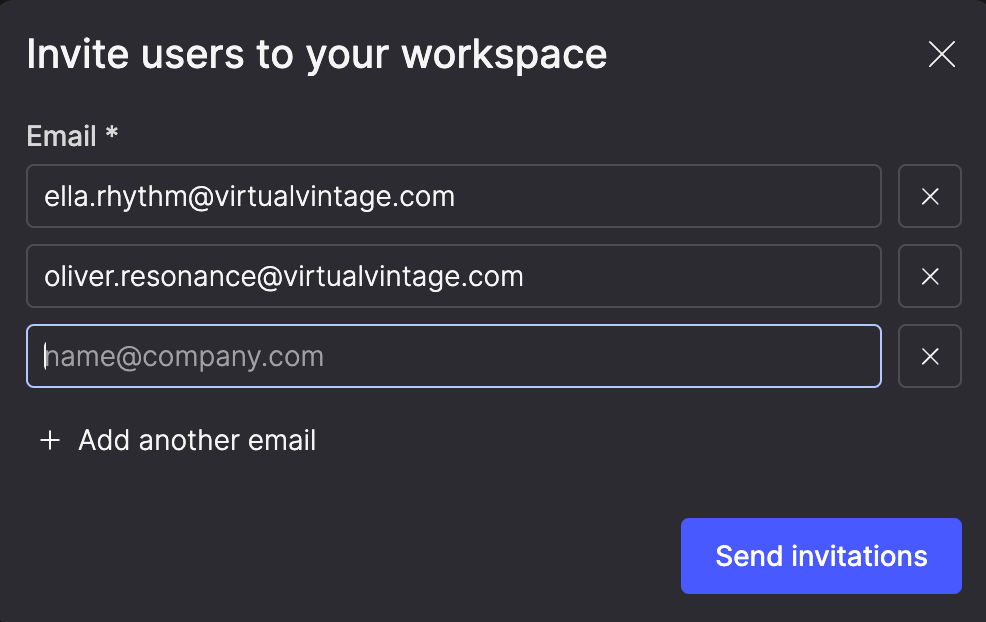
- Send the invitations.
Once they accept, they'll join your workspace. For step-by-step guidance, see Manage users.
Join a team
Joining a team in Atono is where collaboration takes off, and great ideas turn into action. If you're not yet a member of any team, your Home page will display a shortcut to join an existing public team.
- Click Join a team.
- In the Team field, search for or select the name of the team you want to join.
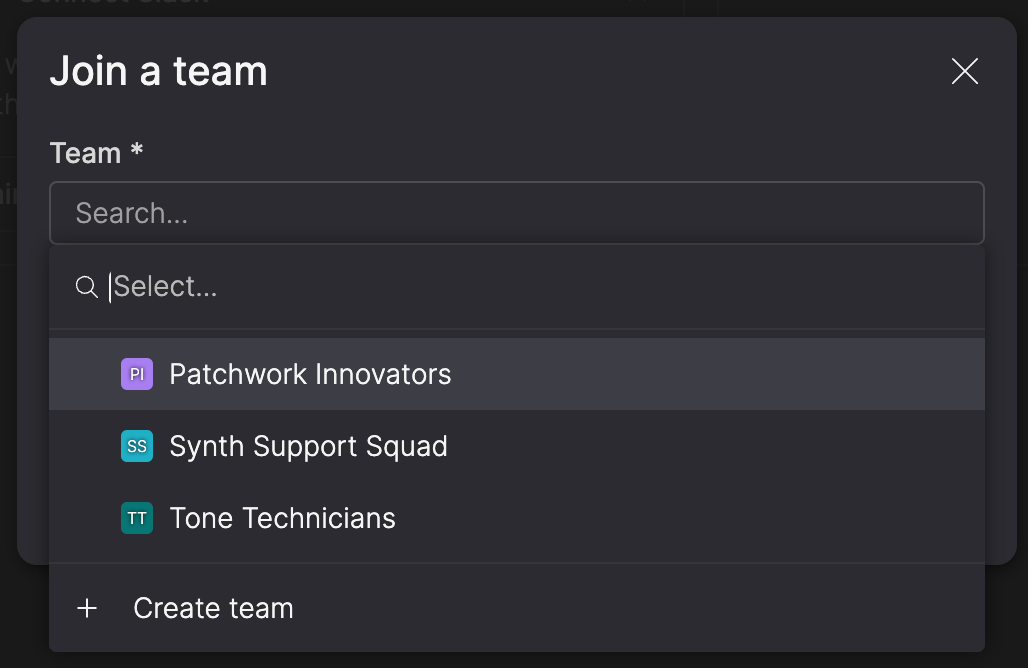
- Click Join team.
Create and join a team
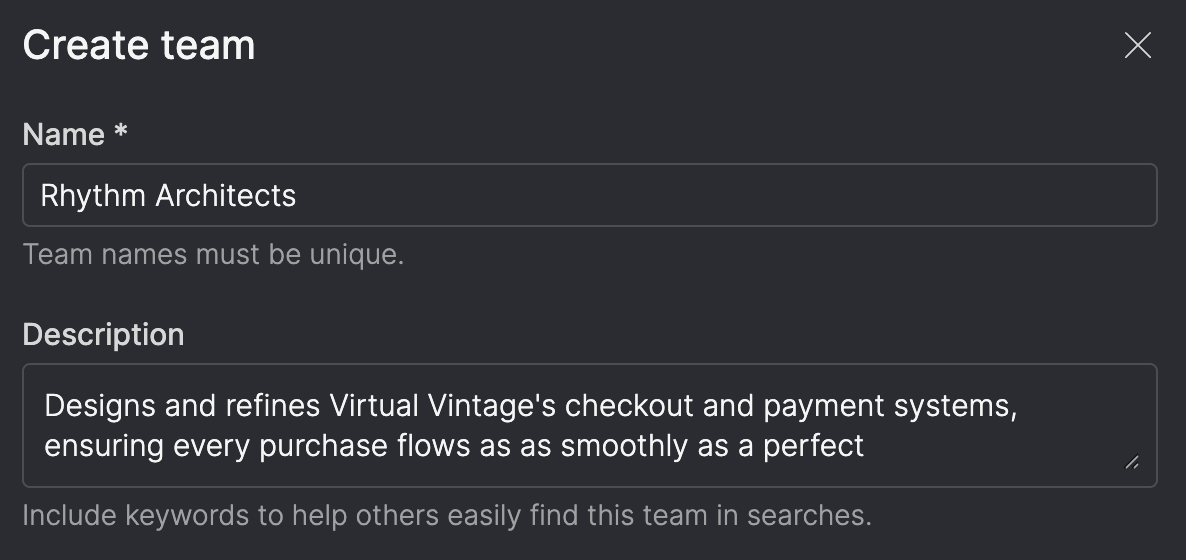
Don't see a team you want to join? Create a new team to kick off an initiative or collaborate with a specific group on focused work.
- Click Create team.
- Give your team a name and optional description.
- Include keywords in the description to help people find this team in searches.
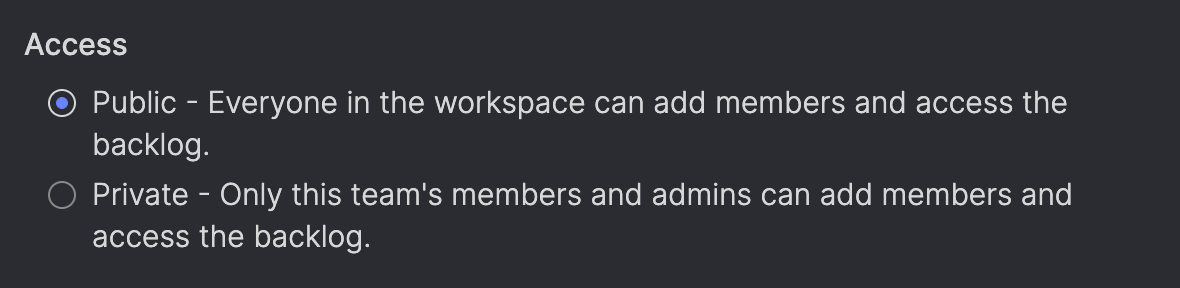
- Choose whether access to the team is public or private.
- Select whether to enable backlog management for this team (you can enable this later).

- Click Create and join team.
For a deeper dive into creating and managing teams, see Teams.
Connect to Slack
Stay in sync with your team by integrating Slack with Atono. This makes it easy to stay on top of team conversations, story updates, and feature flags.
- In the Connect Slack pane, click Connect.
- Allow Atono to access your Slack workspace.
- In the Join team Slack channels dialog, click Join channels to add yourself to any Slack channels connected to your teams, or click Skip to join later.
Remind me laterIf you're not ready to connect to Slack now, click Remind me—you'll see the prompt again in a week.
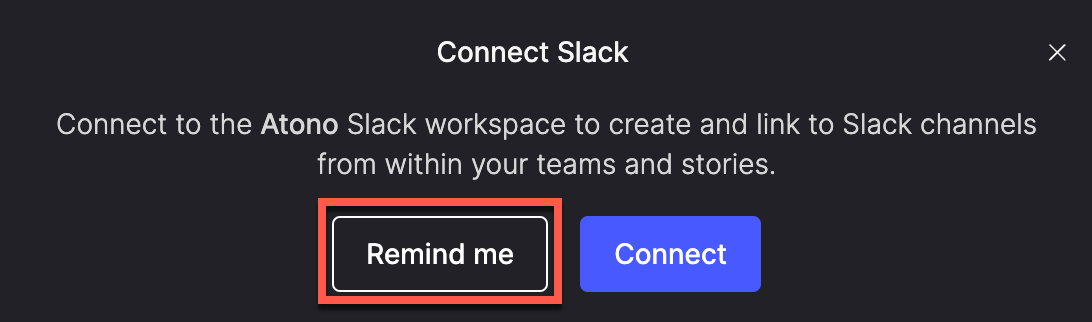
Not using Slack? No problem! Click the X to remove this pane from your Home page. You can always connect later from your user profile.
For more details, see Slack.
Manage widgets
Your Home page includes built-in widgets that give you quick access to important backlog items. You can also add widgets for any saved or shared view from the Everything page.
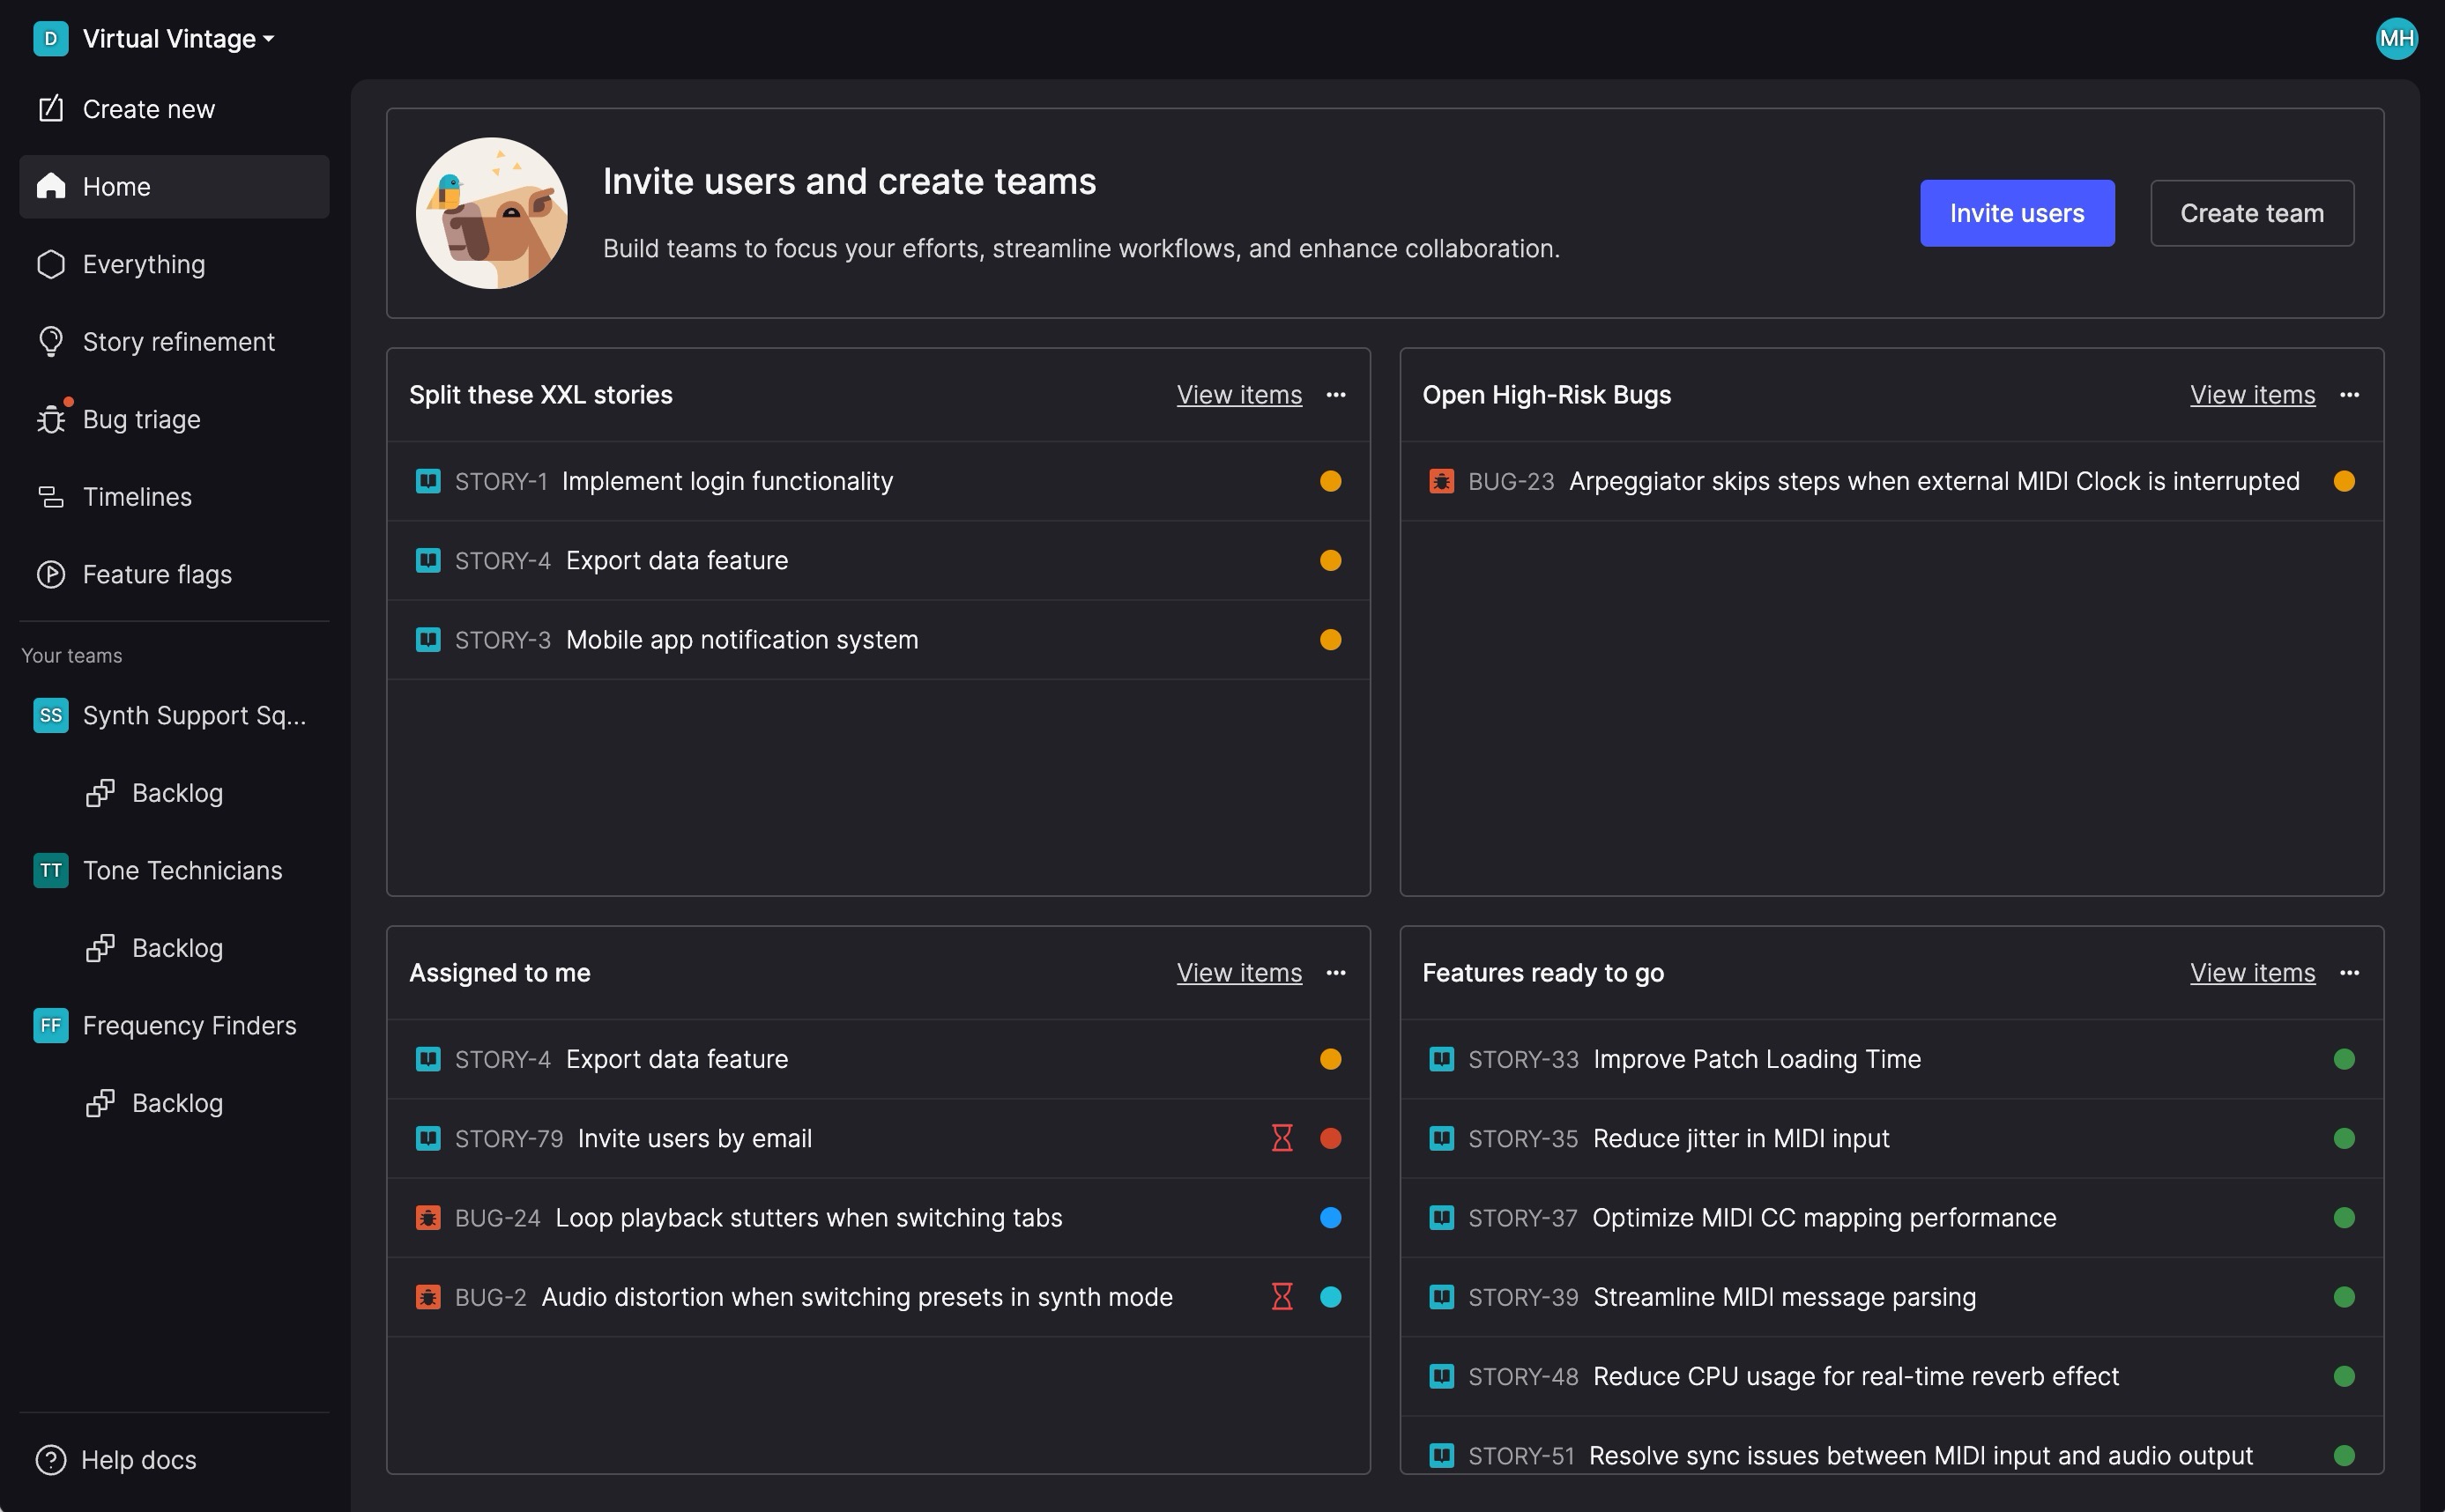
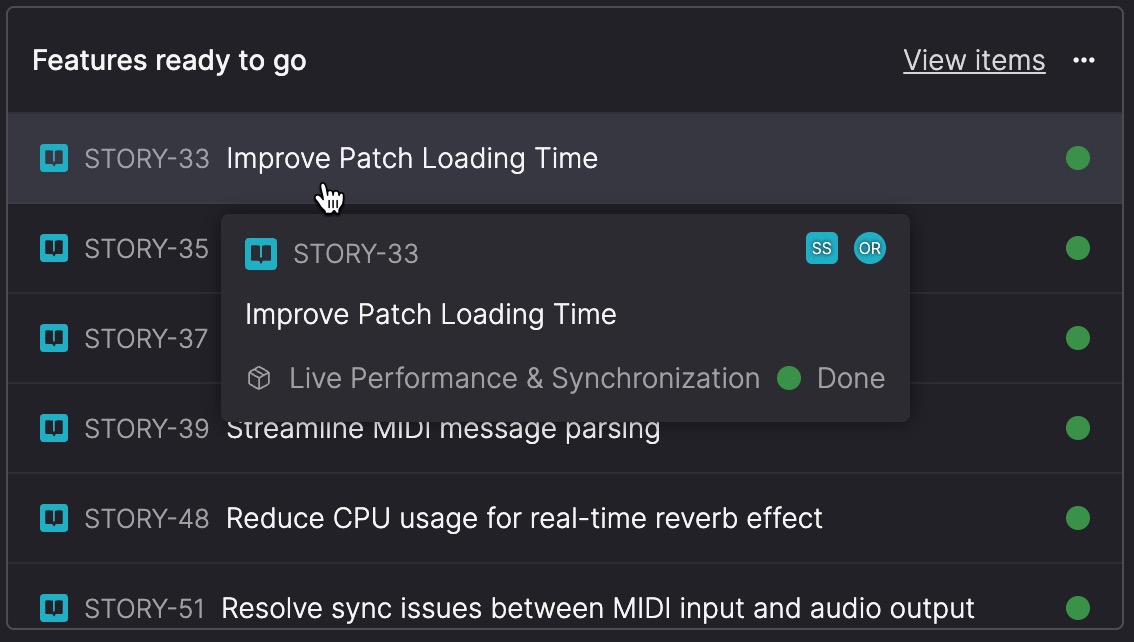
Each widget shows a list of items with their:
- Item ID
- Title
- Workflow step icon (colored circle)
- Staleness indicator (if the item is stalled in its current step)
Hover over an item to see additional details:
- Risk rating (for bugs)
- Assignee
- Team
- Workflow step name
- Timebox
- Product theme (for stories)
Click View items to open the full view on the Everything page.
Assigned to me
The Assigned to me widget shows all backlog items currently assigned to you. It appears on your Home page by default, and you can move or remove it like any other widget.
Following
The Following widget shows the backlog items you’re following. It uses a preset filter so you can access these items quickly. For more details, see Follow a story or Follow a bug.
Add a widget
- Hover over an empty space on the Home page.
- Click + Add widget when it appears.
- Select the view you want to display.
Remove a widget
- Click the ellipsis (...) icon in the widget’s header.
- Select Remove.
- In the Remove widget dialog, conform by clicking Remove widget. This removes it from your Home page—it doesn’t delete the view.
Rearrange widgets
You can rearrange widgets by clicking and dragging them into a new position. This can be helpful if you want to keep certain views visible without scrolling, or to group related widgets together in a way that makes sense for your workflow.
To move a widget, click and drag it to a new position on the Home page. The other widgets will adjust.