Saved and shared views
Save filters, sorting, and columns so you can revisit or share your view anytime.
Tailor the page to fit how you work—filter items, sort them, and choose which columns to show. When you find a view that’s useful, save it so you can return to it anytime without repeating the same steps.
Saved views make it easy to switch between different contexts, share your filters and layout with teammates, and even pin views to your Home page as widgets.
You can save multiple views for different goals, toggle between them as needed, and access views your teammates have shared with you. The Everything page always opens with the default Everything view, but you can switch to any saved or shared view at any time.
Default views
There are two default views which always appear in your list and can be accessed at any time:
- Everything: Shows all items
- Assigned to me: Shows any backlog items (stories or bugs) assigned to you.
Load a view
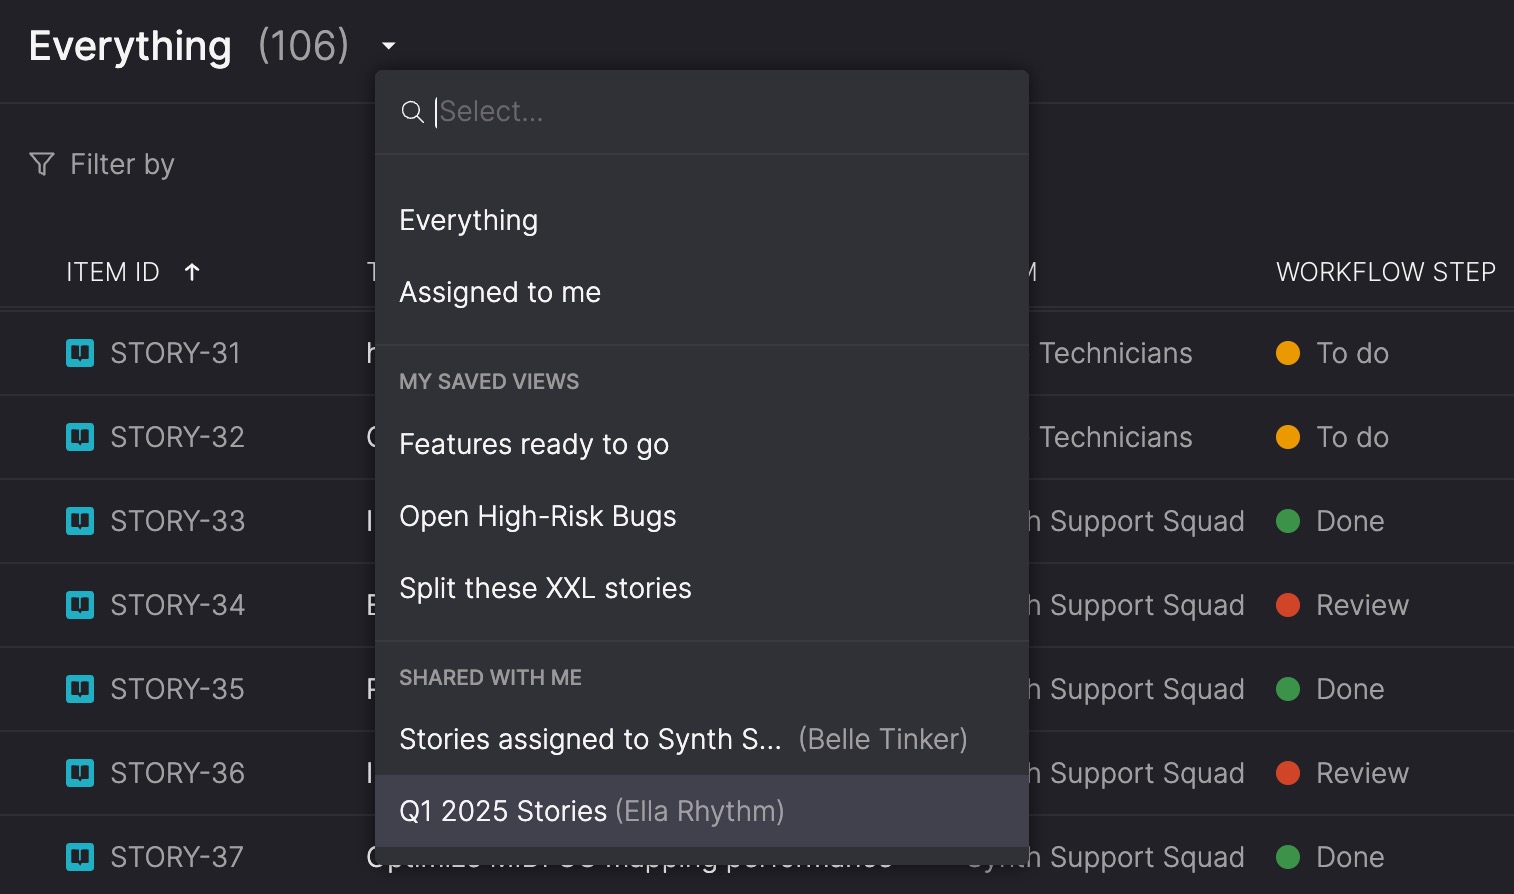
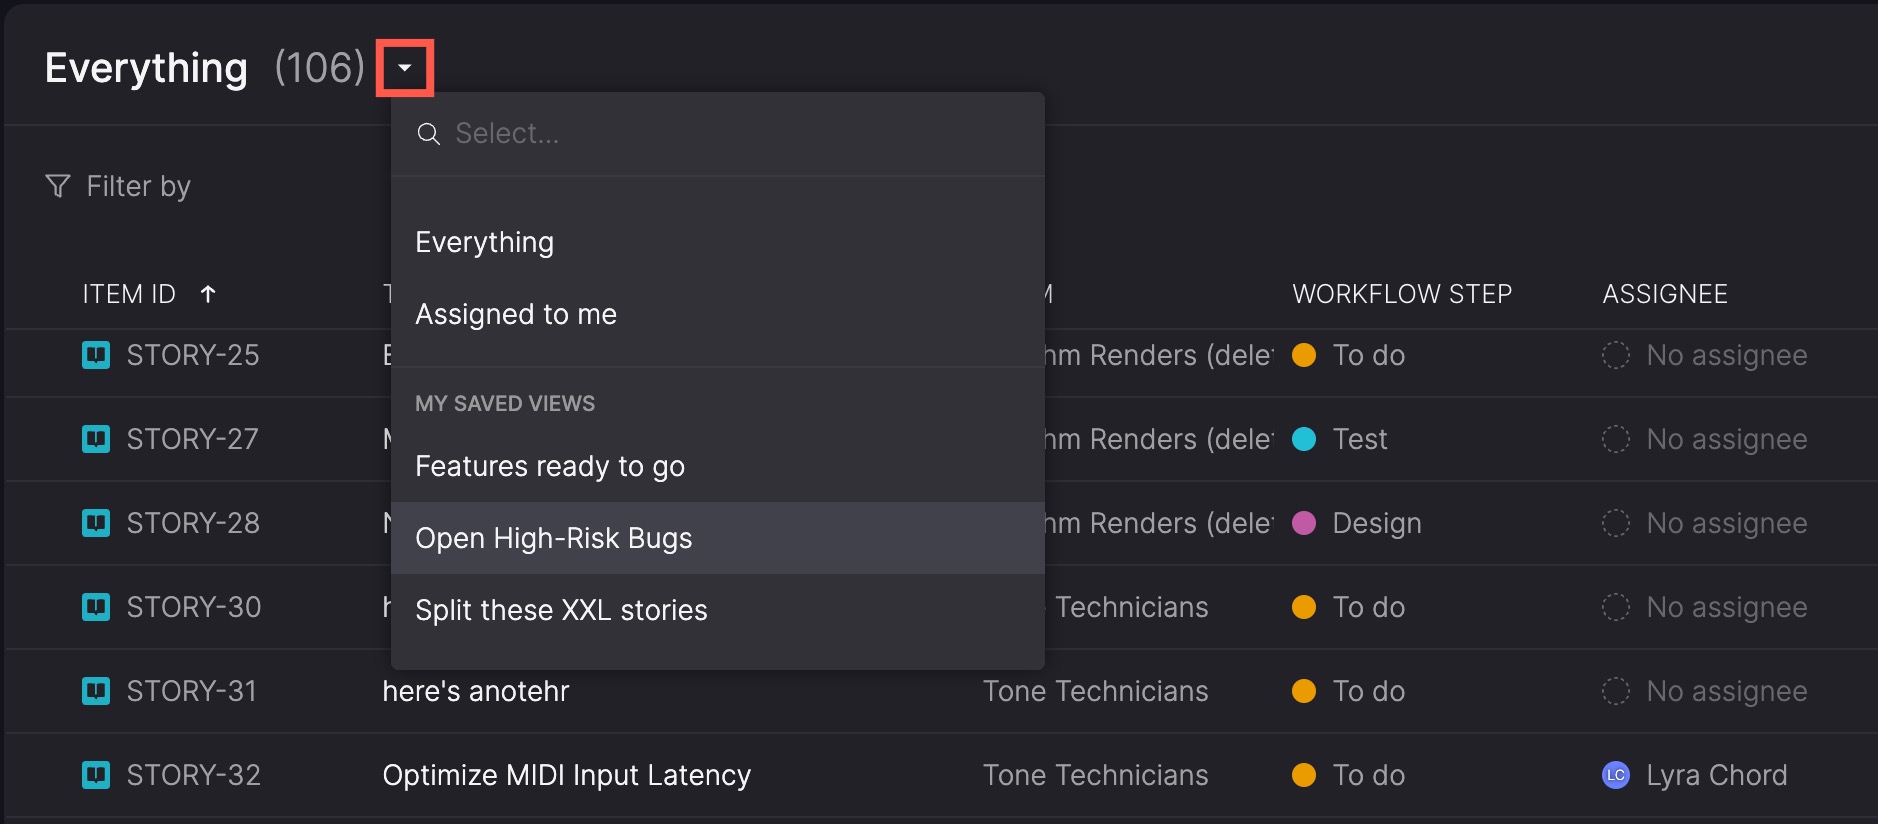
You can access default, saved, shared views from the Everything page header.
- Click the down arrow next to the current title in the header (e.g., 'Everything' or a custom view name).
- Select a view from the dropdown. You can search a specific view by name.
- If you've made changes to the current view, you'll be asked whether you want to save them before switching views.
Save a view
When you save a view, it captures:
- The view name (must be unique to you)
- Filters and their values
- Sort order
- Column selections, order, and widths
You can update your own saved views or create new ones. You can't modify default views or views shared with you by others.
Save a new view
- Apply filters, sorting, and column customizations on the Everything page.
- Click Save as new view.
- In the Save as new view dialog, enter a name for your view. The name must be unique to you and up to 100 characters.
- Click Save view.
Save changes to a view
- Modify your current view as needed.
- Click Save view.
- In the Save view dialog, optionally update the view's name (this will rename it rather than create a new one).
- Click Save view.
Share a view
Sharing a view lets others see and use the same filters, sorting, and columns you’ve applied. You can share a view with individuals or teams. When shared with a team, it appears in the shared views list for every team member.
Views shared with you appear under My shared views in the dropdown, with the name of the person who created the view.
You can re-share views that were shared with you. If you share a view with someone, you can remove that specific share. The view's owner can remove anyone on the shared list, even if they weren't the one who added them.
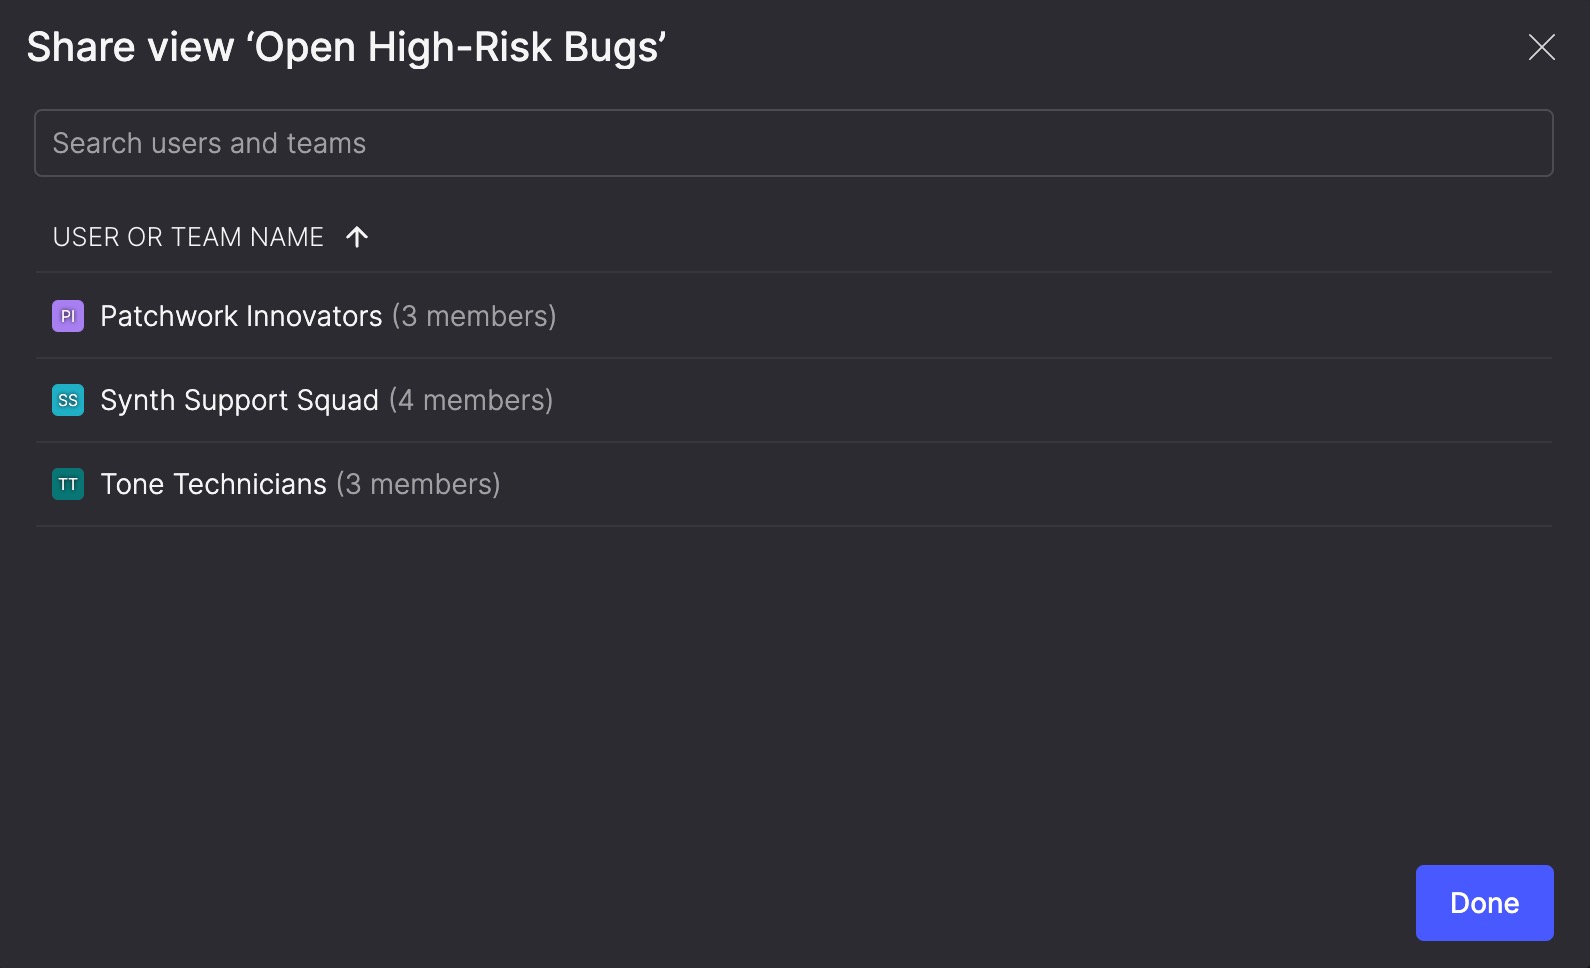
- Click the Share (upload) icon in the Everything page header.
- In the Share view dialog, search for and select the user or team. They'll be added to the list of who the view is shared with.
- To remove someone you've added, hover over their name, click the ellipsis (...) icon, and select Remove.
- Click Done.
Share a view URL
You can also share a view temporarily by copying the URL. When someone opens the link, they’ll see the same filters and sorting you applied. If they want to keep it, they can save it as their own view. If they don’t, the next time they visit the Everything page, they’ll see the default Everything view.
The link doesn’t include column selections, order, or widths—just filters and sorting.
You can copy and share a URL at any time, even if the view isn't saved.

Remove a shared view
If someone shares a view with you and you no longer want it in your list, you can remove it—unless it was shared with a team you are a member of. If you no longer want the view shared with your team, you may need to ask the creator of the view, or the person who shared it, to remove your team from the shared list.
- Click the down arrow next to the Everything page title.
- Hover over the name of the shared view you want to remove.
- Click the X icon that appears.
- In the Remove shared view dialog, confirm by clicking Remove view.
- This confirms that you’ll no longer be able to access the shared view unless it’s shared with you again.
Delete a view
You can delete any view you've created. If you've shared the view, others will lose access. If anyone added it as a widget on their Home page, the widget will stop displaying content.
- On the Everything page, load the view you want to delete.
- Click the Delete (trash can) icon in the header.
- In the Delete view dialog, confirm by clicking Delete view.
Updated 4 months ago