Atono Chrome extension
Report bugs, flip flags, and map clicks for usage tracking—right in your browser.
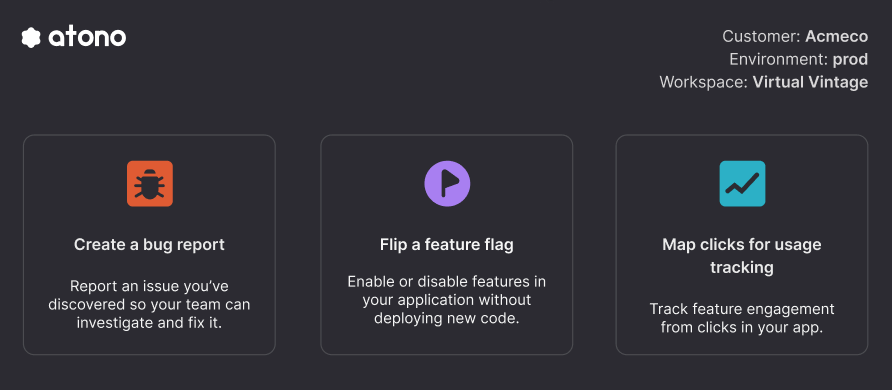
The Atono Chrome extension simplifies testing and debugging for applications built with Atono. It allows you to report bugs, flip feature flags, and set up usage tracking by mapping clicks in your application—all directly from your browser. This reduces context-switching and removes the need for code changes, so your team can focus on testing features, resolving issues, and delivering value faster.
Required setup for the Atono extensionThe extension relies on meta tags to understand your environment and (if applicable) your tenancy setup. For implementation details, see the Meta tags section.
Key benefits
The Atono extension helps your team:
- Report bugs for your application: Submit detailed bug reports directly from your browser while using your application. Automatically include important details like the current URL, operating system, browser viewport size, and console and network errors.
- Flip feature flags: Adjust flags in your browser for faster rollbacks, testing, or demos of new functionality.
- Map clicks for usage tracking: Configure usage tracking without code by mapping real clicks in your application to stories in Atono.
Install the extension
You can download the Atono extension directly from the Chrome Web Store.
- In the Chrome Web Store, search for and select the Atono extension.
- Click Add to Chrome.
- In the confirmation dialog, click Add extension.
- After installing, refresh the page where your application is running.
Just installed the extension?If you see a message about completing setup, close the extension and refresh the page. This ensures the extension is able to detect your application's required meta tags.
Use the Atono extension
Report bugs
Simplify bug reporting for your application by automatically collecting essential context, like the URL, browser information, and console and network errors.
- Open the Atono extension and click Report a bug.
- Fill out the bug report template. This uses the same format as in the Atono web application. For more details, see Create a bug.
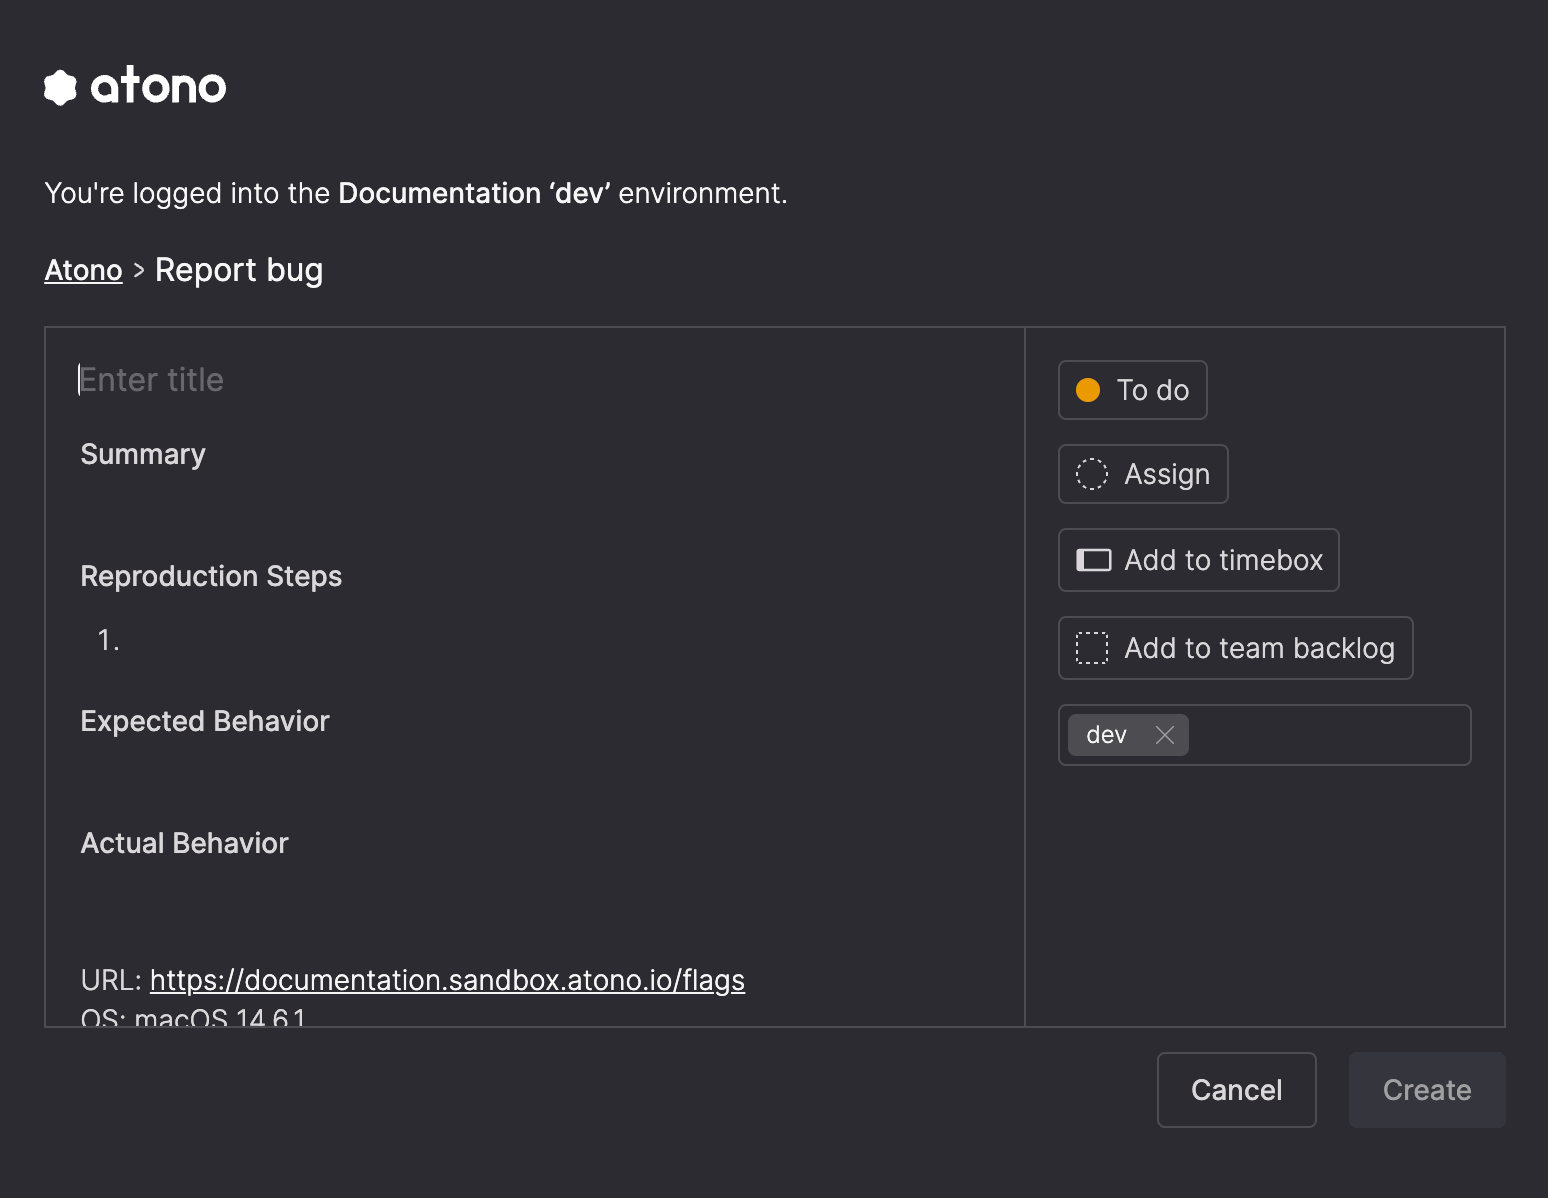
- Click Create to submit the bug.
- After submission, choose from the following options:
- Create another: Report another bug.
- View bug: Open the bug in the Atono web application.
- <Back : Return to the extension menu.
Meta tag issues can also block bug reportingIf your application is considered multi-tenant and the tenancy meta tag is missing, the extension will prevent bug creation. See implementation details for more information.
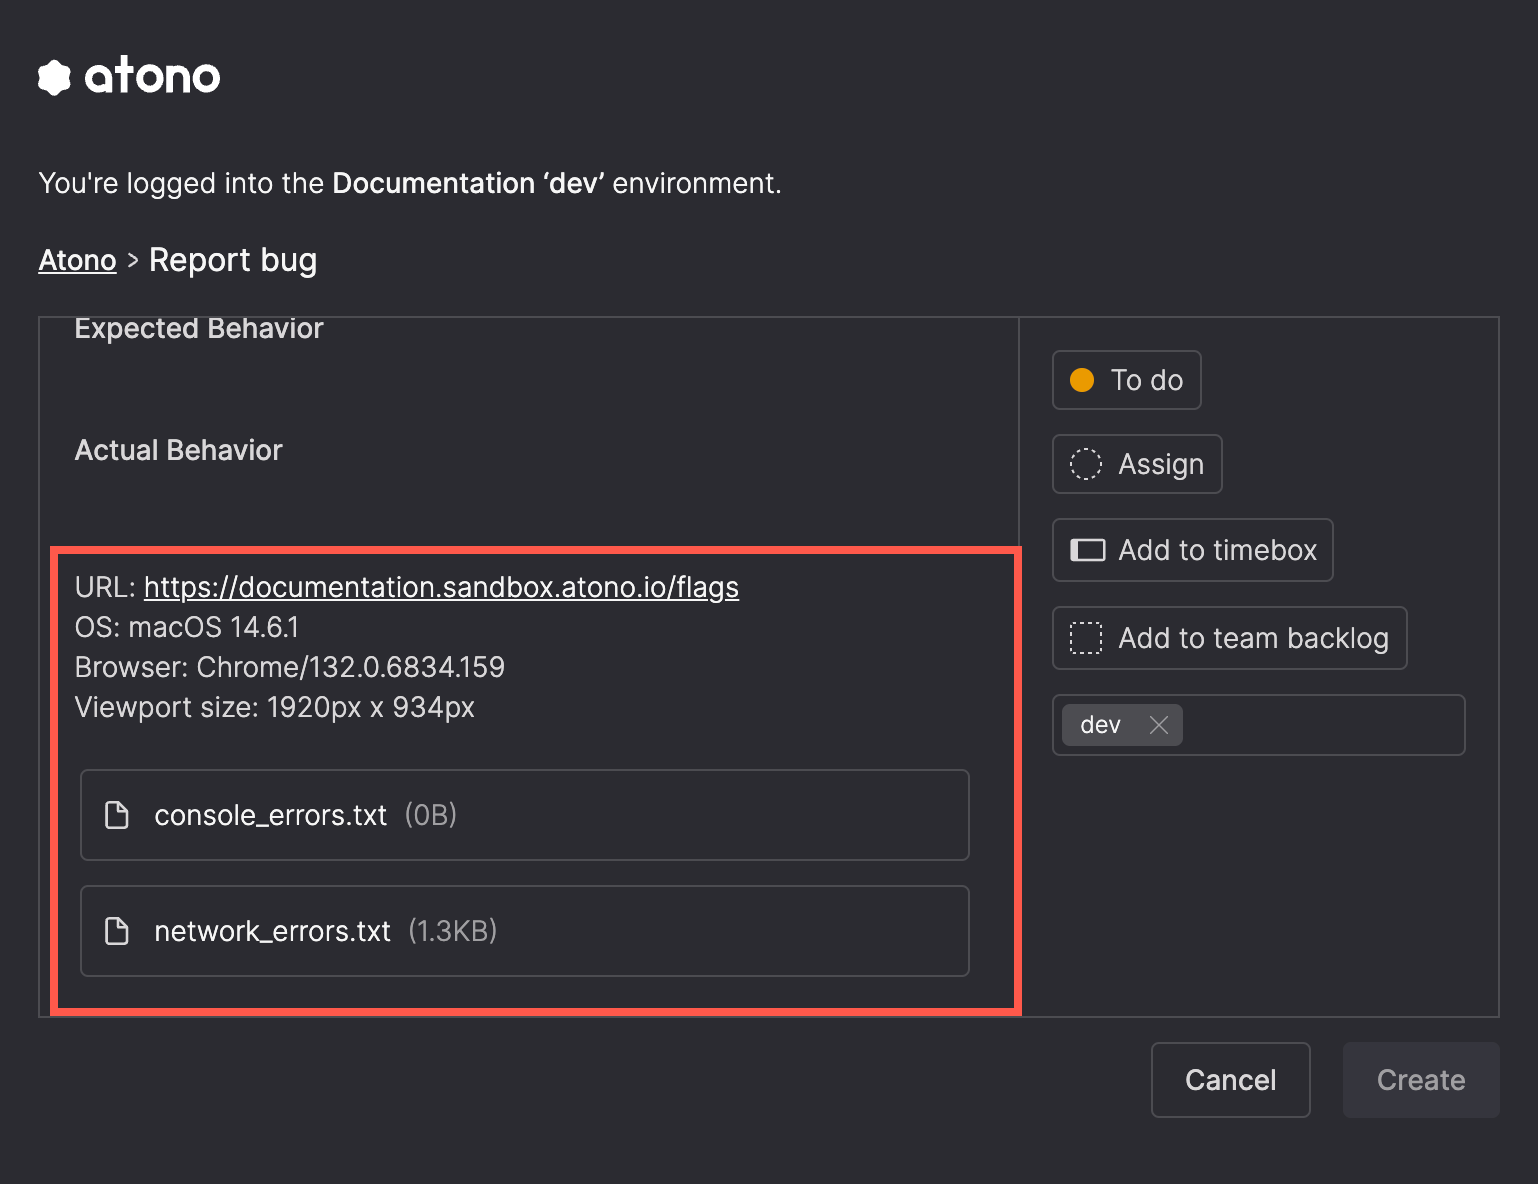
Details automatically included in bug reports
The extension automatically collects and attaches the following details to every bug:
- Current URL
- Operating system
- Browser details
- Viewport size
- Console errors (.txt file)
- Network errors (.txt file)
Flip feature flags
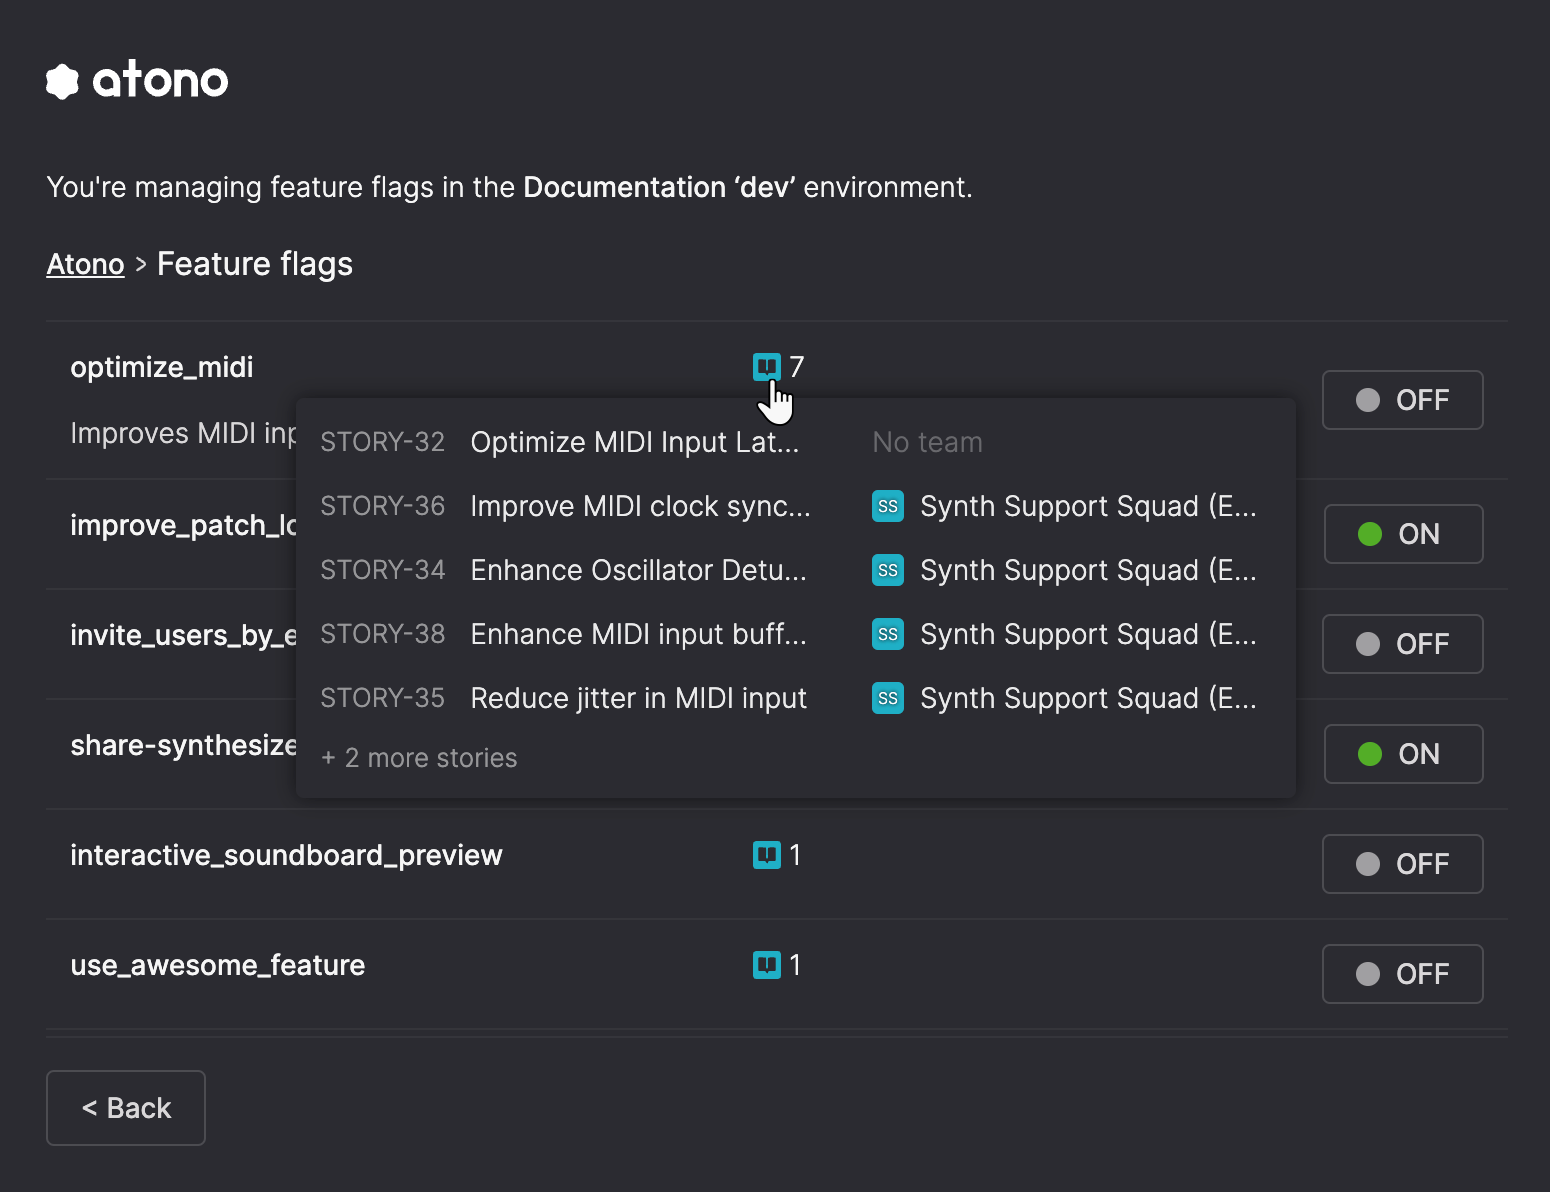
Flip feature flags to test or demo new functionality or quickly roll back changes in your application. The extension applies changes to the current application, environment, and, if applicable, the customer (for multi-tenant applications).
If your application is multi-tenant, but the required tenancy meta tag is missing, the extension may not allow you to flip flags and will display an error. If your application is single-tenant, this tag is not required, and the extension should operate in single-tenant mode.
To flip feature flags, you'll need the appropriate permissions, and the application must be integrated with Atono's feature flag system. Flag flipping depends on valid meta tag setup.
-
Open the Atono extension and click Flip a feature flag.
-
Confirm that the workspace and environment displayed are correct.
-
Find the flag you want to update. You can view a list of which stories the flag applies to by hovering over the stories (book) icon.
-
Click the flag's current status (ON or OFF) and choose the new status from the menu.
- For multi-tenant applications, the extension automatically applies the change to the relevant slice (a subset of the application for the current customer) for the current customer or creates a new slice if none exists.
Slices in single-tenant environmentsWhen a flag in a single-tenant environment has existing slices, the extension warns you before saving. Updating the flag replaces all slice-specific configurations with a single environment-wide value. You can cancel to keep the slices or continue to apply the update globally.
- In the Update flag configuration dialog, click Update to save your changes, or click X to cancel.
- Click out of the extension to return to your application.
How multi-tenant mode is detectedThe extension determines whether your app is multi-tenant based on whether any feature flag in the current environment includes a slice that references the Customer attribute—even if the flag is inactive.
If so, the extension treats the environment as multi-tenant and requires a tenancy meta tag. If the tag is missing, the extension will block feature flag updates and bug reporting.
If no customer-based slices exist in the environment, the extension assumes it's single-tenant and doesn't require the tag.
Map clicks for usage tracking
Track how often features are used by mapping real clicks in your application to stories in Atono. This provides a no-code way of setting up usage tracking compared to instrumenting the Atono SDK directly in your code.
Before you beginA developer on your team needs to do a small amount of setup before click mapping will work. They must:
- Install and initialize the Atono SDK in the browser – The SDK must be running client-side for click mapping to work.
- Add the required meta tags – The environment meta tag is required for all apps. The tenancy meta tag is required if your app serves multiple customers.
For detailed setup instructions, see Set up usage tracking (Steps 1 and 2). The “Tag the feature” step is not required for click mapping.
- Open the Atono extension and click Map clicks for usage tracking.
- Review how the extension works, and then click Start mapping.
Step 1. Select a story to map clicks to
- Search and select the Atono story you want to map clicks to. Recorded clicks will count toward this story and be reported in this story's Feature engagement usage graph.
Step 2. Record a click on an element
The extension is designed to map clicks on interactive elements, such as buttons and links. Mapping passive elements (like images) is not supported.
Tip: If clicking an element causes the page to fully reload, the click might not be tracked. Usage is most reliable for interactions that don't reload the page, such as in-app navigation in single-page applications.
- Make sure you're on the page in your app with the element (such as a button or link) that you want to track. When you're ready, click Record next click on an element.
- Hover over elements in your app to discover which ones you can capture clicks on. Capturable elements are highlighted as you hover over them.
- Click on a element to select it.
While in record mode, your click will be intercepted and not perform its normal action. To exit record mode, click Exit recording mode.
- After you've selected an element, choose an HTML attribute to uniquely identify it. You can click into the Search bar to view suggestions, such as
id,name, orclass.
Best practice: Choose an
idattribute whenever possible. It's usually unique and stable, which improves tracking accuracy.
- If the same attribute appears in more than one place (for example, the same button ID on multiple pages), click on all of those elements will be counted.
- Once you've selected an HTML attribute, click Accept mapping.
- If you change your mind and want to select a different element, click Clear to repeat Step 2.
Step 3. Done! Clicks on that element are now recorded in the story's usage data
You've successfully set up tracking for that element in the selected story. Click the name of the story to open it in Atono and view the Feature engagement graph.
If you'd like to set up other elements to track, click Map another click.
If you're finished, click Done to return to the main screen of the Atono Chrome extension.
What gets counted
Atono records all clicks on the mapped element across your product. In Atono, you can filter usage data by environment, customer, location, or other elements to focus on specific usage patterns. For more information, see Feature engagement.
Important notes
- Page reloads: If clicking something reloads the entire page, that interaction might not be recorded. Tracking works best for clicks that don’t reload the page.
- Multiple location: If the same element appears in more than one place in your app, clicks on all of them will be included in the count.
- SDK required: Click mapping only works if the Atono SDK is running in the browser.
Manage mapped actions
Mapped actions created through the Atono Chrome extension can be removed later if you no longer want the extension to record usage for a specific element (for example, if the UI changes or a mapping was created incorrectly).
Removing a mapped action:
- Stops new usage from being collected for that action.
- Does not delete previously recorded usage.
Mapped actions are managed from the story’s Feature engagement settings in the Atono web application. For full details, see Step collection new usage.
What about usage tracked in code?Usage recorded directly through the Atono SDK does not appear as a removable mapping. To stop SDK-based tracking, a developer must update or remove the relevant record() calls in the application code.
Clearing previously recorded usageRemoving a mapping doesn’t delete any usage that was already recorded—whether it came from the Chrome extension or from the SDK.
To reset a story’s usage data, use Clear data in the story’s Feature engagement settings. Clearing data permanently removes all historical usage but does not affect any active mappings or SDK-based tracking.
For full details, see the Clear usage data.
Troubleshooting
If something’s not working, the extension may show a helpful error message. Here are some common cases and how to fix them:
Installation
“Just installed the extension? Close the extension and refresh your page to complete the setup.”
The extension's content script hasn't initialized yet. Close the extension, refresh the page, and reopen it.
Missing environment meta tag
“This site's environment information is either missing or misconfigured.”
The atono:environment meta tag is required on all pages where the extension is used. Add the tag to your HTML. See Meta tags.
Missing tenancy meta tag
“This site’s tenancy meta tag is missing.”
Your environment contains customer-based slices, but the atono:tenancy tag is missing. Either add the tag, or remove all slices that reference Customer in this environment.
Environment not found in workspace
“You’re logged into the ‘X’ Atono workspace, but this site uses an environment that doesn’t exist in that workspace.”
The environment tag doesn't match any environments in your current workspace. Log into the correct workspace, or update the tag to match a valid environment key.
Slices removed after flipping a flag
If slices disappear after you update a flag in a single-tenant environment, the extension is working as intended. When you confirm the update, slice-level configurations are replaced with a single global configuration. To recreate or manage slices, use the Atono web application.
Differences between the extension and web UI
The Atono Chrome extension is designed for quick, in-context changes while using your application.
| Feature | Atono Chrome extension | Atono web UI |
|---|---|---|
| Report bugs | ✅ Yes, with automatic context (browser, system, etc.) | ✅ Yes, no automatic context |
| Flip feature flags | ✅ Yes, for the current environment and tenant | ✅ Yes, across all environments, tenants, and by location |
| Map clicks for usage tracking | ✅ Yes, directly from your app | ❌ No |
| View or configure feature flag slices | ❌ No | ✅ Yes |
| Create or manage environments | ❌ No | ✅ Yes |
The extension only flips flags for the current environment and tenant. To change flags for other environments, other customers, or use location-based targeting, use the Atono web UI.
Implementation details
Meta tags
For the extension to function with your application, specific meta tags must be added to your site. These meta tags provide the extension with critical context about your environment and setup, ensuring it integrates seamlessly with Atono's features.
What are meta tags?Meta tags are snippets of HTML code that provide information about a webpage, often called metadata (details about the page's purpose or environment). They're not visible on the page itself, but they help tools, search engines, and applications understand the page's content and context.
For the Atono extension, meta tags are essential because they:
- Identify theAtono environment where the application is running (such as dev, test, or prod).
- Specify the customer (for multi-tenant applications), ensuring actions are applied to the correct user or organization.
Meta tags are typically added to the <head> section of a web page's HTML because this part of the page contains information about the document, such as metadata, styles, and scripts, which tools and applications like the Atono Chrome extension can access before the page loads.
Here's an example:
<meta property="atono:environment-key" content="value-goes-here">If you're not familiar with HTML or meta tags, think of them as digital labels that the Atono extension reads to understand how to work with your site. Work with your development team to add or modify these tags based on the requirements below.
Required meta tags for Atono
Add the following meta tags to the <head> section of your HTML:
Environment key
The environment key identifies the environment where your application is running—such as in dev, test, or prod—and ensures the extension can connect to the correct instance.
You can copy the environment key from the Environments page in the Atono web application.
<meta property="atono:environment" content="<your-environment-key>">Tenancy (customer)
The tenancy meta tag is only required for multi-tenant applications. It specifies the customer's tenant ID, ensuring feature flag changes and bug reports apply to the correct user or organization.
If your application is single-tenant, you should omit this tag.
<meta property="atono:tenancy" content="<customer-tenant-id>"><meta property="atono:tenancy" content="<customer-tenant-id>">