

Attachments
Add screenshots, mockups, and other files to your stories, bugs, and epics to keep everyone on the same page.
Attachments keep screenshots, mockups, recordings, and other supporting files with the work they relate to. Bug reporters can attach screenshots or videos that show an issue, and story and epic authors can add mockups, diagrams, or documents that give the team the context they need.
Attach a file to an item
You can attach files to stories, bugs, and epics, including draft stories and bugs, by dragging and dropping them, selecting them from your device, or pasting images from your clipboard.
Each item can have up to 100 attachments, and each file can be up to 50 MB. The total storage available across your workspace depends on your plan.
Depending on your plan, you might have access to only the most recent attachments in your workspace, based on when they were added. Older attachments aren't deleted, and you can access more of them by upgrading your plan.
If you're working on a draft story or bug, attachments must finish uploading before you can create the item.
Attach a file to the general area
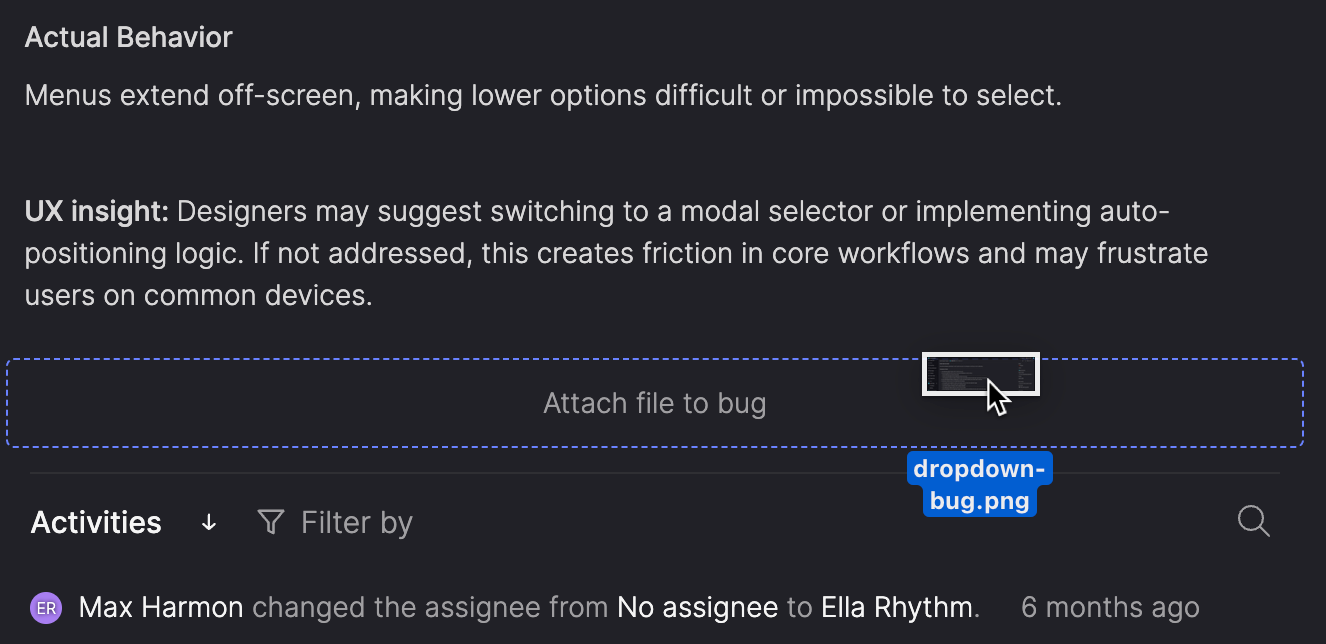
Files that apply to the item as a whole go in the general attachments area below the item's content. To attach a file there, do any of the following:
- Drag the file onto the item and release it when the drop zone appears below the content.
- In the header, click the Add attachment (paper clip) icon and select the file from your device.
- In a draft story or bug, click Attach files in the prompt at the bottom of the draft and select the file from your device.
- Paste an image while the item's content is in focus.
On stories, files you drop or paste anywhere outside an acceptance criterion, including the additional content area, are added to the general attachments area.
Attach file to an acceptance criterion
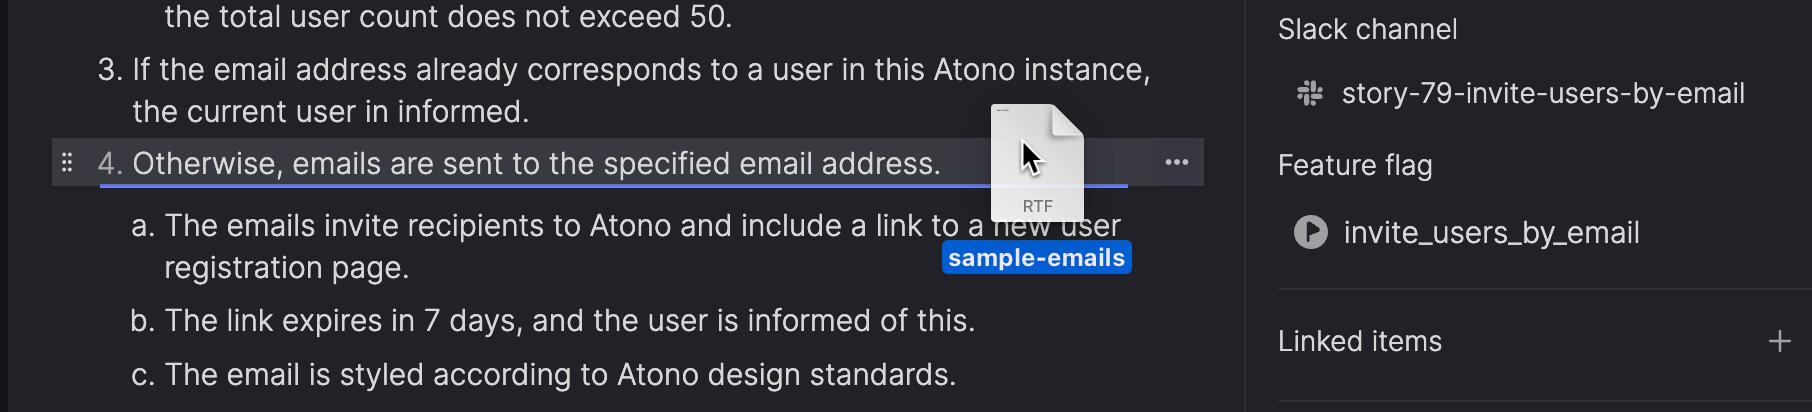
On stories, you can attach files to a specific acceptance criterion (AC), so supporting material sits next to the requirement it relates to. To attach a file to an AC, do any of the following:
- Drag the file onto the AC. As you drag, a line shows where the file will be placed when you release it.
- Hover over the AC, click the ellipsis (...) icon that appears, and select Attach file.
- Paste an image while the AC is selected or in focus.
View attachments
Attachments appear below the content they're attached to, either under an AC or in the general attachments area at the bottom of the item. Images and videos are shown as thumbnails, and other files are shown with their file name and size.
Preview an attachment
Click anywhere on an attachment, other than its action icons, to open it in the attachment viewer. Images and videos are displayed in the viewer itself, with images larger than your screen expanding to fill the available space and smaller images shown at their original size. Files that can't be previewed show 'No preview available', but you can still download or delete them from the viewer.
The viewer shows the file name, along with icons to download or delete the attachment.
Move between attachments
The viewer lets you move through the other attachments in the same location, so the general attachments area has its own set and each AC has its own set. Attachments appear in the same order as they do on the item, which you can change by moving them forward or backward. This makes it easy to arrange mockups in sequence and step through them in order.
To move to the previous or next attachment, do any of the following:
- Click the arrow icons on either side of the viewer.
- Press the left or right arrow key.
- Press J for the previous attachment or K for the next one.
Navigation wraps around, so moving forward from the last attachment takes you back to the first. If there's only one attachment in that location, the arrows aren't shown.
Close the viewer
Click X, press Escape, or click anywhere outside the viewer.
Manage attachments
The actions for managing an attachment appear when you hover over it.
Download an attachment
- Hover over the attachment.
- Click the download (arrow) icon.
You can also download an attachment from the attachment viewer.
Move an attachment forward or backward
Change the order of attachments within the same location, either an AC or the general attachments area. This works the same way on stories, bugs, and epics.
- Hover over the attachment.
- Click the Move attachment backward (<) icon to move it one position earlier, or the Move attachment forward (>) icon to move it one position later.
Your changes are saved automatically.
Move attachment between locations
On stories, you can move an attachment from one AC to another, or between an AC and the general attachments area.
- Hover over the attachment you want to move.
- Click and hold the attachment, then drag it to an AC or to the general attachments area.
- Release the attachment when it's in the right spot.
Your changes are saved automatically.
Resize an attachment
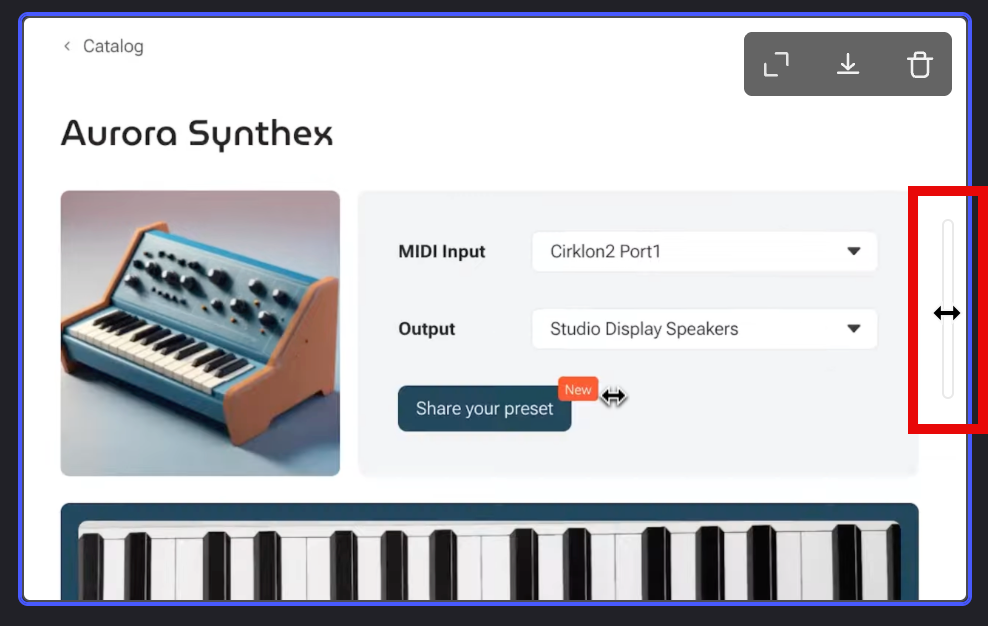
Resize an image or video attachment to make it easier to see without opening the attachment viewer. The new size is saved, so everyone who views the item sees the attachment at that size.
- Hover over the attachment.
- Click the resize handle on the right side of the attachment and drag it left or right.
Delete an attachment
Deleting an attachment can't be undone.
- Hover over the attachment.
- Click the delete (trash can) icon.
- In the confirmation dialog, click Delete file to confirm, or click X to cancel.
You can also delete an attachment from the attachment viewer. The file is removed from the item, and the Activities list keeps a record of the deletion, including the file name and who deleted it.
Attachment activity
Atono records attachment activity in the item's Activities list, including the names of files that are added or deleted. To show only attachment activity, filter the Activities list by the 'Attachment' type.
For more details, see Filter by type.
Updated 16 days ago