Timeboxes
Organize work into focused, time-bound groups to prioritize and plan releases.
Timeboxes group related stories and bugs into a defined period with start and end dates. They help teams prioritize work, align around delivery windows, and understand what's planned when. Timeboxes appear on timelines and reflect the current state of the work they include.
Manage timeboxes
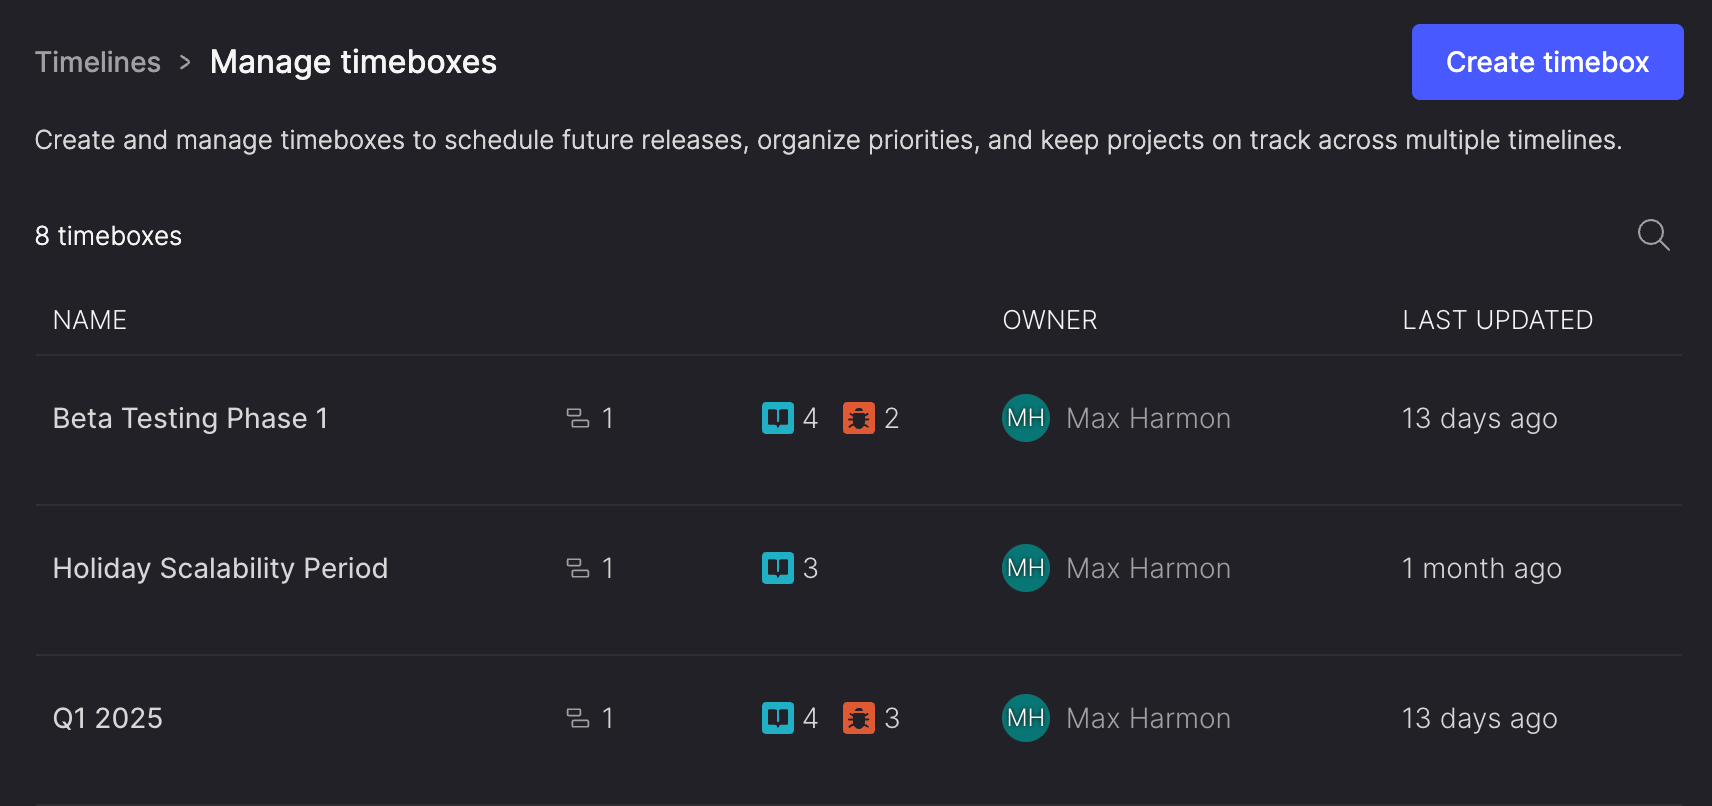
The Manage timeboxes page provides a table of all timeboxes in your workspace, with the following details:
- Timebox name and description.
- Number of timelines the timebox appears on. Hover over the timeline icon to view a list of timelines where the timebox is included.
- Number of stories and bugs included. Hover over the story or bug icon to view a list of the items and their current workflow step.
- Owner (creator) and last updated date.

From this page you can:
- Create new timeboxes.
- Edit or delete existing timeboxes.
- Search timeboxes by name or description.
- Drill into to individual timeboxes to view more detailed information.
Create a timebox
- In the side menu, click Timelines.
- On the Timelines page, click Manage timeboxes.
- On the Manage timeboxes page, click Create timebox.
- In the Create timebox dialog:
- Enter a unique name for your timebox. Special characters like @ { } ' ~ | aren't allowed.
- Optionally, add a description to explain the timebox's purpose.
- Select the Start date and End date of the timebox.
- Add stories or bugs to the timebox. To remove an item, click the X on the item pill.
- Click Create timebox, or click X to cancel.
Edit timebox details
- On the Manage timeboxes page, click the name of the timebox you want to edit.
- On the timebox details page, click the ellipsis (..) icon next to the timebox name.
- From the menu, select Edit timebox details.
- In the Edit timebox details dialog, edit the timebox's name or description as needed.
- Click Update details, or click X to cancel.
Delete a timebox
You might want to delete a timebox if it is no longer needed or relevant from your team's work.
From the Manage timeboxes page:
- On the Manage timeboxes page, hover over the timebox you want to delete.
- Click the ellipsis (...) icon at the far right of the table row.
- Select Delete timebox.
- In the Delete timebox dialog, click Delete timebox, or click X to cancel.
From the timebox details page:
- On the Manage timeboxes page, click the name of the timebox.
- On the timebox details page, click the ellipsis (...) icon next to the timebox name.
- From the menu, select Delete timebox.
- In the Delete timebox dialog, click Delete timebox, or click X to cancel.
View a timebox
You can view a timebox from the Manage timeboxes page or directly from a timeline:
- On the Manage timeboxes page, click the name of the timebox.
- On the timeline, double-click the timebox.
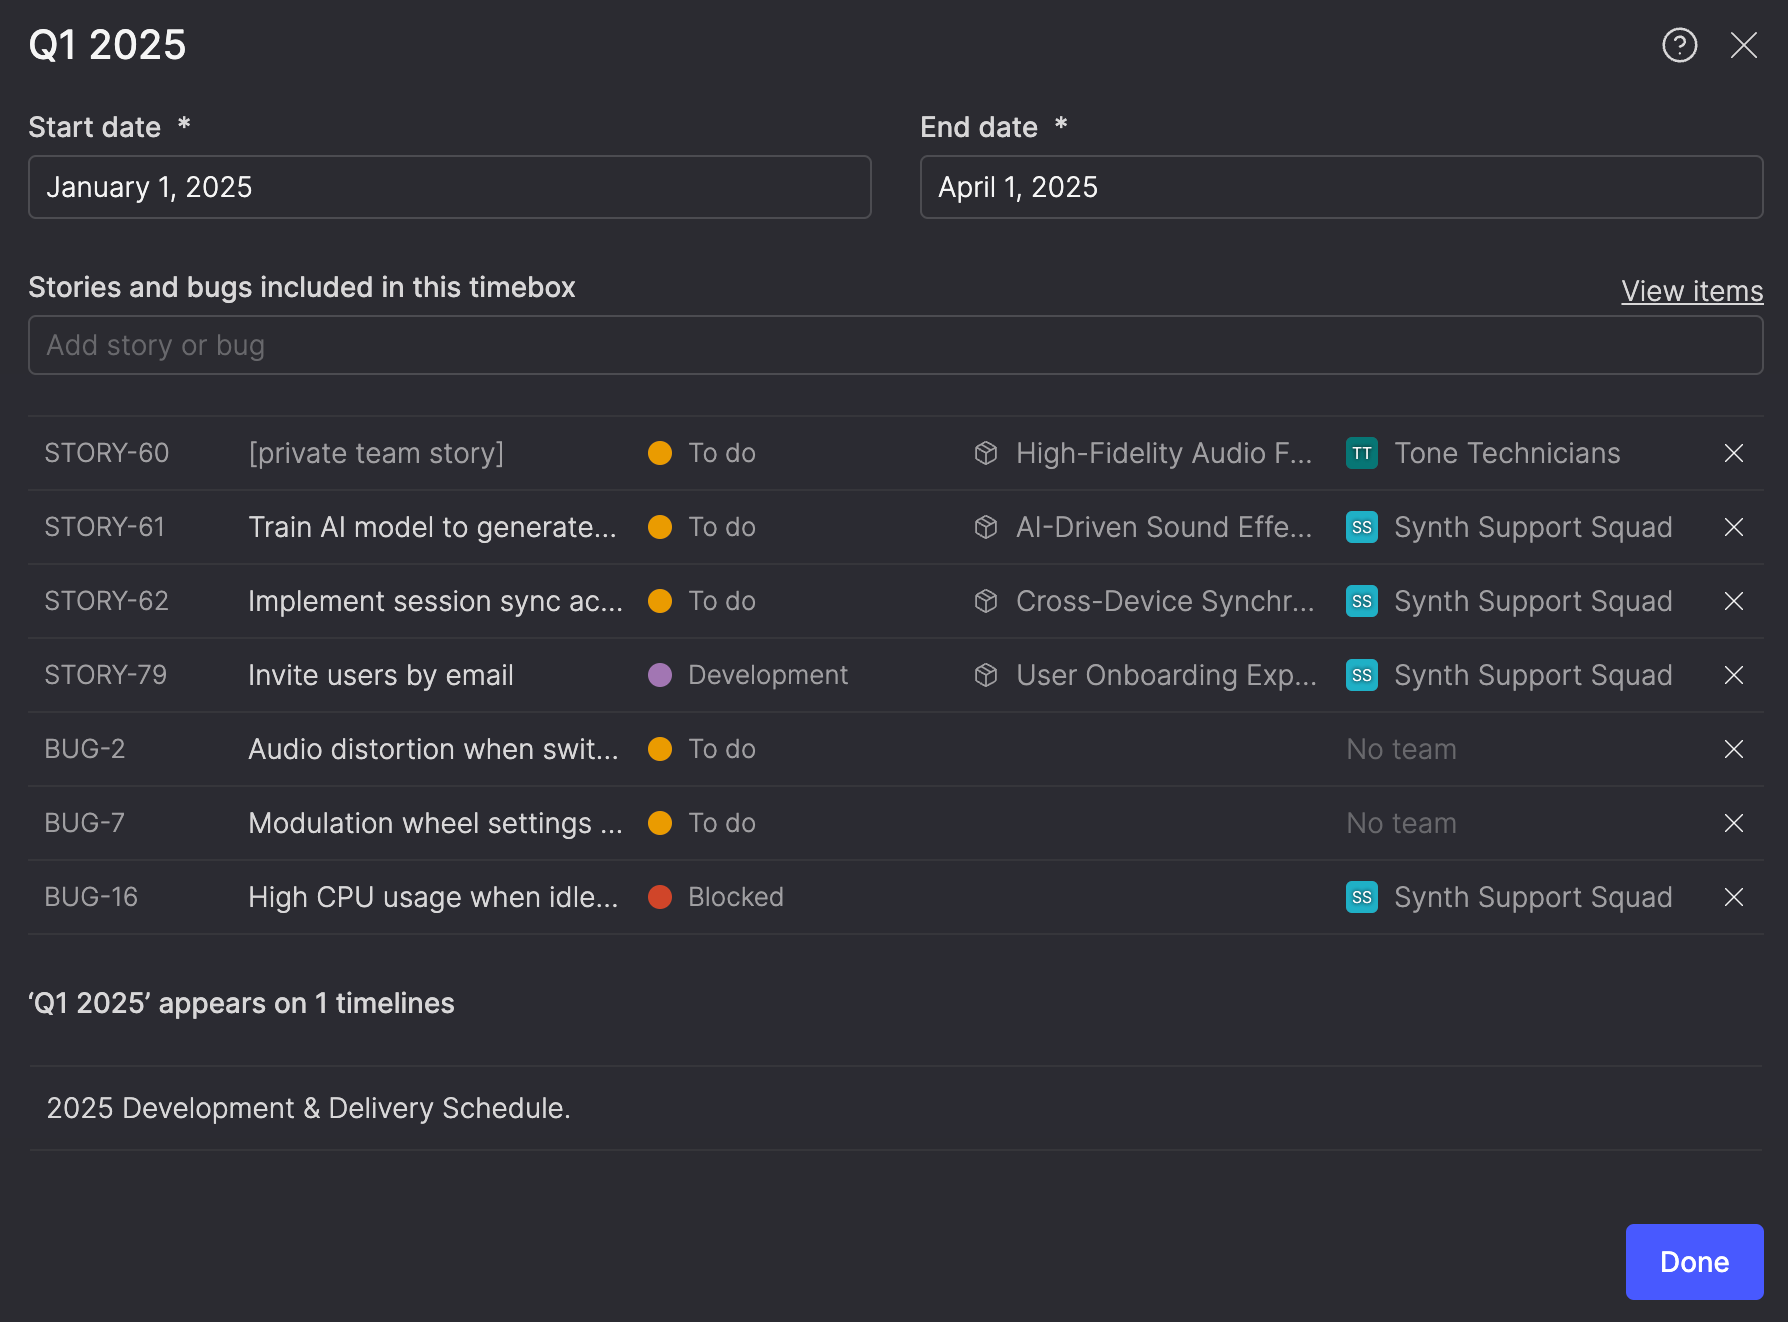
The timebox details page allows you to:
- View and edit the timebox's start and end dates.
- See all included items with details like their Item ID, title, workflow step, product theme, and team backlog.
- Add or remove items.
- Review delivery signals for individual items.

Identify items with warnings
Timeboxes show warnings at the item level so you can see exactly what may affect delivery.
When a story or bug is unlikely to be completed within the timebox dates, it’s highlighted in the timebox details view. These item-level warnings explain why a timeline may show a warning indicator for the timebox.
Warnings don’t prevent items from being included in a timebox. They provide context to help you decide whether to adjust scope, sequencing, or ownership.

Projected completion
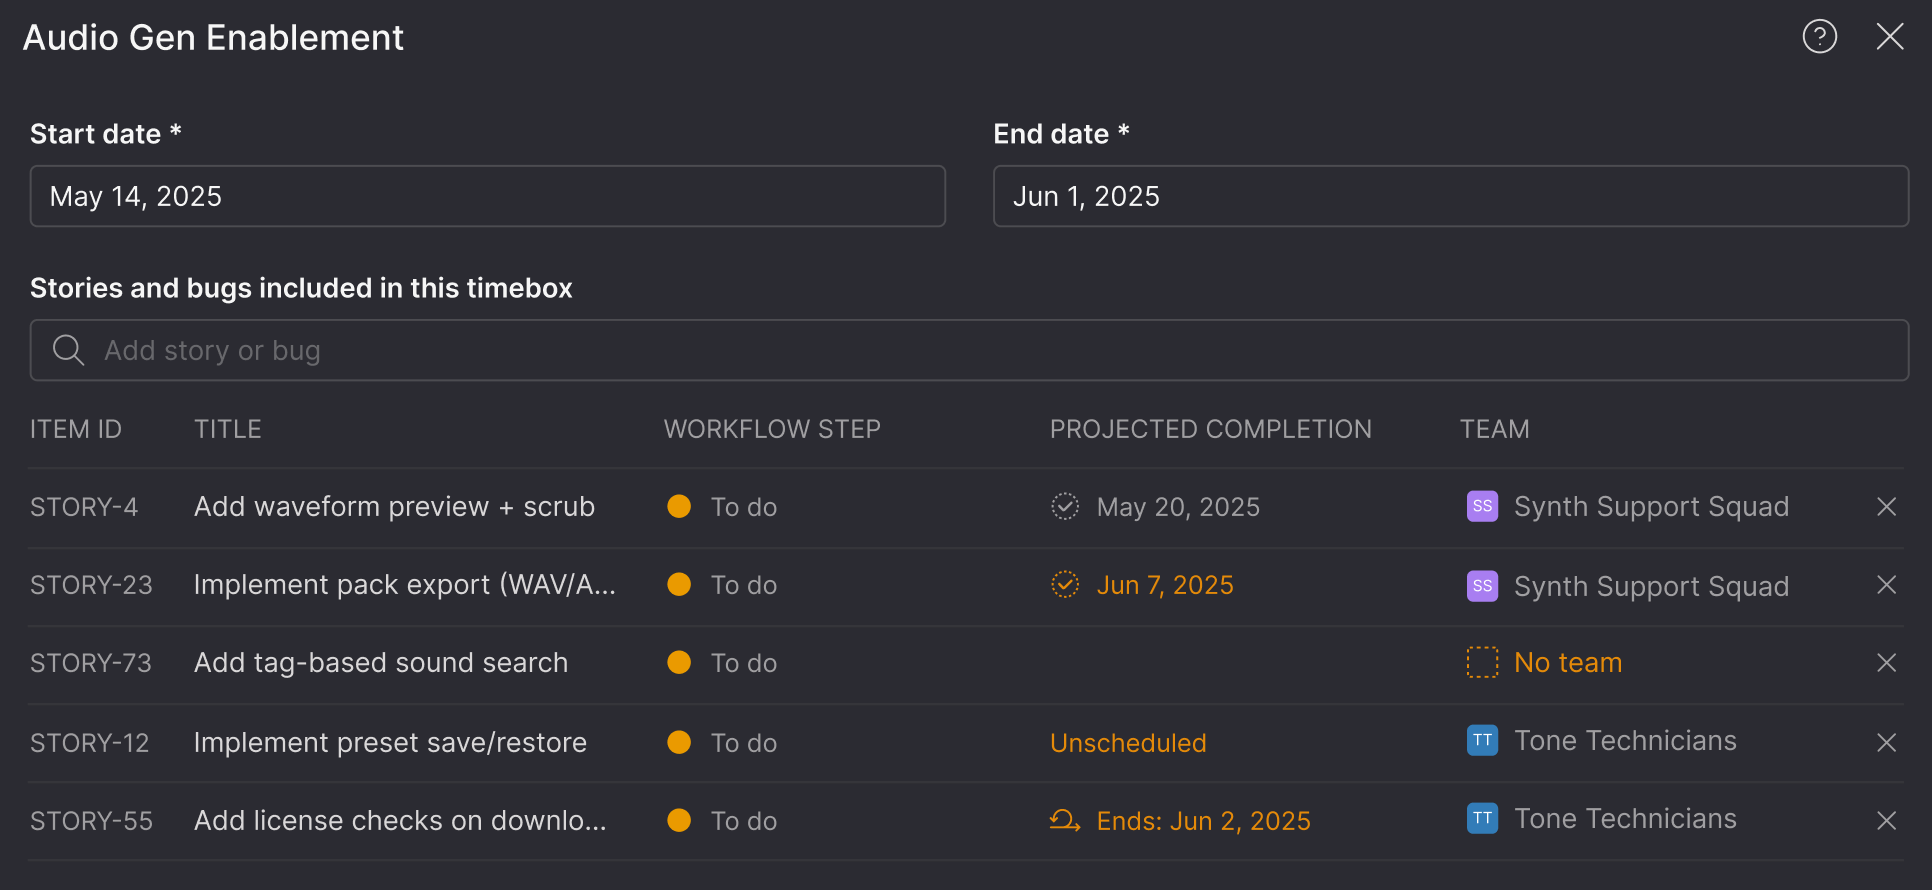
The timebox details page includes a Projected completion column. This shows when each story or bug is expected to be completed relative to the timebox end date.
The information shown in this column depends on how the item is planned and tracked.
Items on Kanban teams
For stories and bugs on Kanban teams, the Projected completion column shows when the item is expected to finish.
Items in 'To do' or 'In progress' display a projected date. For items already in 'In progress', that date reflects when the item entered the workflow step and the team’s current average cycle time.
If the projected completion is after the timebox end date, the item shows a warning.
When a projected completion date isn't available
In some cases, Atono can’t calculate a projected completion date. When this happens, the reason is shown instead, such as:
- The item is already Done.
- The item is in a Won’t do workflow step.
- The item is marked as an Outlier.
- There isn’t enough historical data to calculate a projection.
Items on Scrum teams
For stories and bugs on Scrum teams, warnings are based on sprint alignment rather than projected dates.
An item shows a warning when it:
- Isn’t assigned to a sprint ('Unscheduled').
- Is assigned to a sprint that ends after the timebox end date.
In these cases, the Projected completion column reflects the sprint timing rather than a calculated date.
Items not assigned to a team
Stories and bugs that aren’t assigned to a team backlog show a warning ('No team'). Without a team assignment, Atono can’t determine how the item fits into delivery planning.
Private teams and restricted access
When a timebox includes items from private team backlogs that you don’t have access to:
- Item titles are hidden.
- Projected completion information is shown as 'Private'.
This indicates that the item contributes to the timebox’s warning state, but its details aren’t visible to you.
Add or remove items from a timebox
To add items, search or select items from the Stories and bugs included in this timebox field.
- If an item is already included in another timebox, the name of the timebox will appear next to the the item title. Adding it to a new timebox will prompt a confirmation warning, as the item will be removed from its previous timebox once confirmed.
To remove items, click the X at the far right of the item in the list.
You can also bulk add items from the Everything page. For steps, see Add items to a timebox.
View items in a timebox
The timebox details page includes a list of all of the items in the timebox, including their item ID, title, workflow step, product theme, and team backlog. When a timebox includes private team stories and bugs that you don't have access to, their titles will be redacted.
If all items in a timebox belong to the same team, the page also displays the total story points for those items. This total updates automatically as stories are added, removed, or resized.
To view more details about the items, click View items above the item list.
This opens a filtered view of the Everything page, showing only the items in the timebox you have permission to view.
How timeboxes and timelines work together
Timelines surface warnings at a high level so you can identify timeboxes that may need attention. Opening a timebox shows which specific stories or bugs are driving those warnings and why.
For more information about how timeboxes appear on timelines, see Timelines.
Updated 3 days ago
