Epics
Understand the bigger picture behind your work.
Epics group related stories under a shared purpose—so you can see what problem you're solving, who it's for, and how individual pieces contribute to the outcome.
While stories describe specific deliverable work, epics explain why that work exists and how it fits together. They help your team move from isolated tasks to a clear, shared initiative.
At their simplest, epics are lightweight containers. You define the goal, add supporting details, and associate the relevant stories—so everything tied to an initiative lives in one place, without affecting how stories are scheduled or planned.
What's an epic?
An epic represents the broader objective behind a group of related stories.
It typically includes:
- A title that describes the initiative.
- One or more user stories that define the intended user outcomes.
- A description that captures goals, context, or supporting material.
- A list of stories that deliver the work.
Stories within an epic show their assigned team and current workflow step, so you can quickly understand how work is progressing across teams.
View epics
You can open an epic from anywhere you’re already working with stories or browsing work across your workspace.
Epics are surfaced alongside other backlog items so you can move between individual stories and the broader initiative behind them.
- The Everything page. Use the item type filter to show only epics. You can also filter by specific epics and add an Epic column to the table.
- Search. Use the item type filter to view only epics, or the Epic filter to narrow results to a specific epic.
- Story details view. Open a story and click its epic to see the broader context.
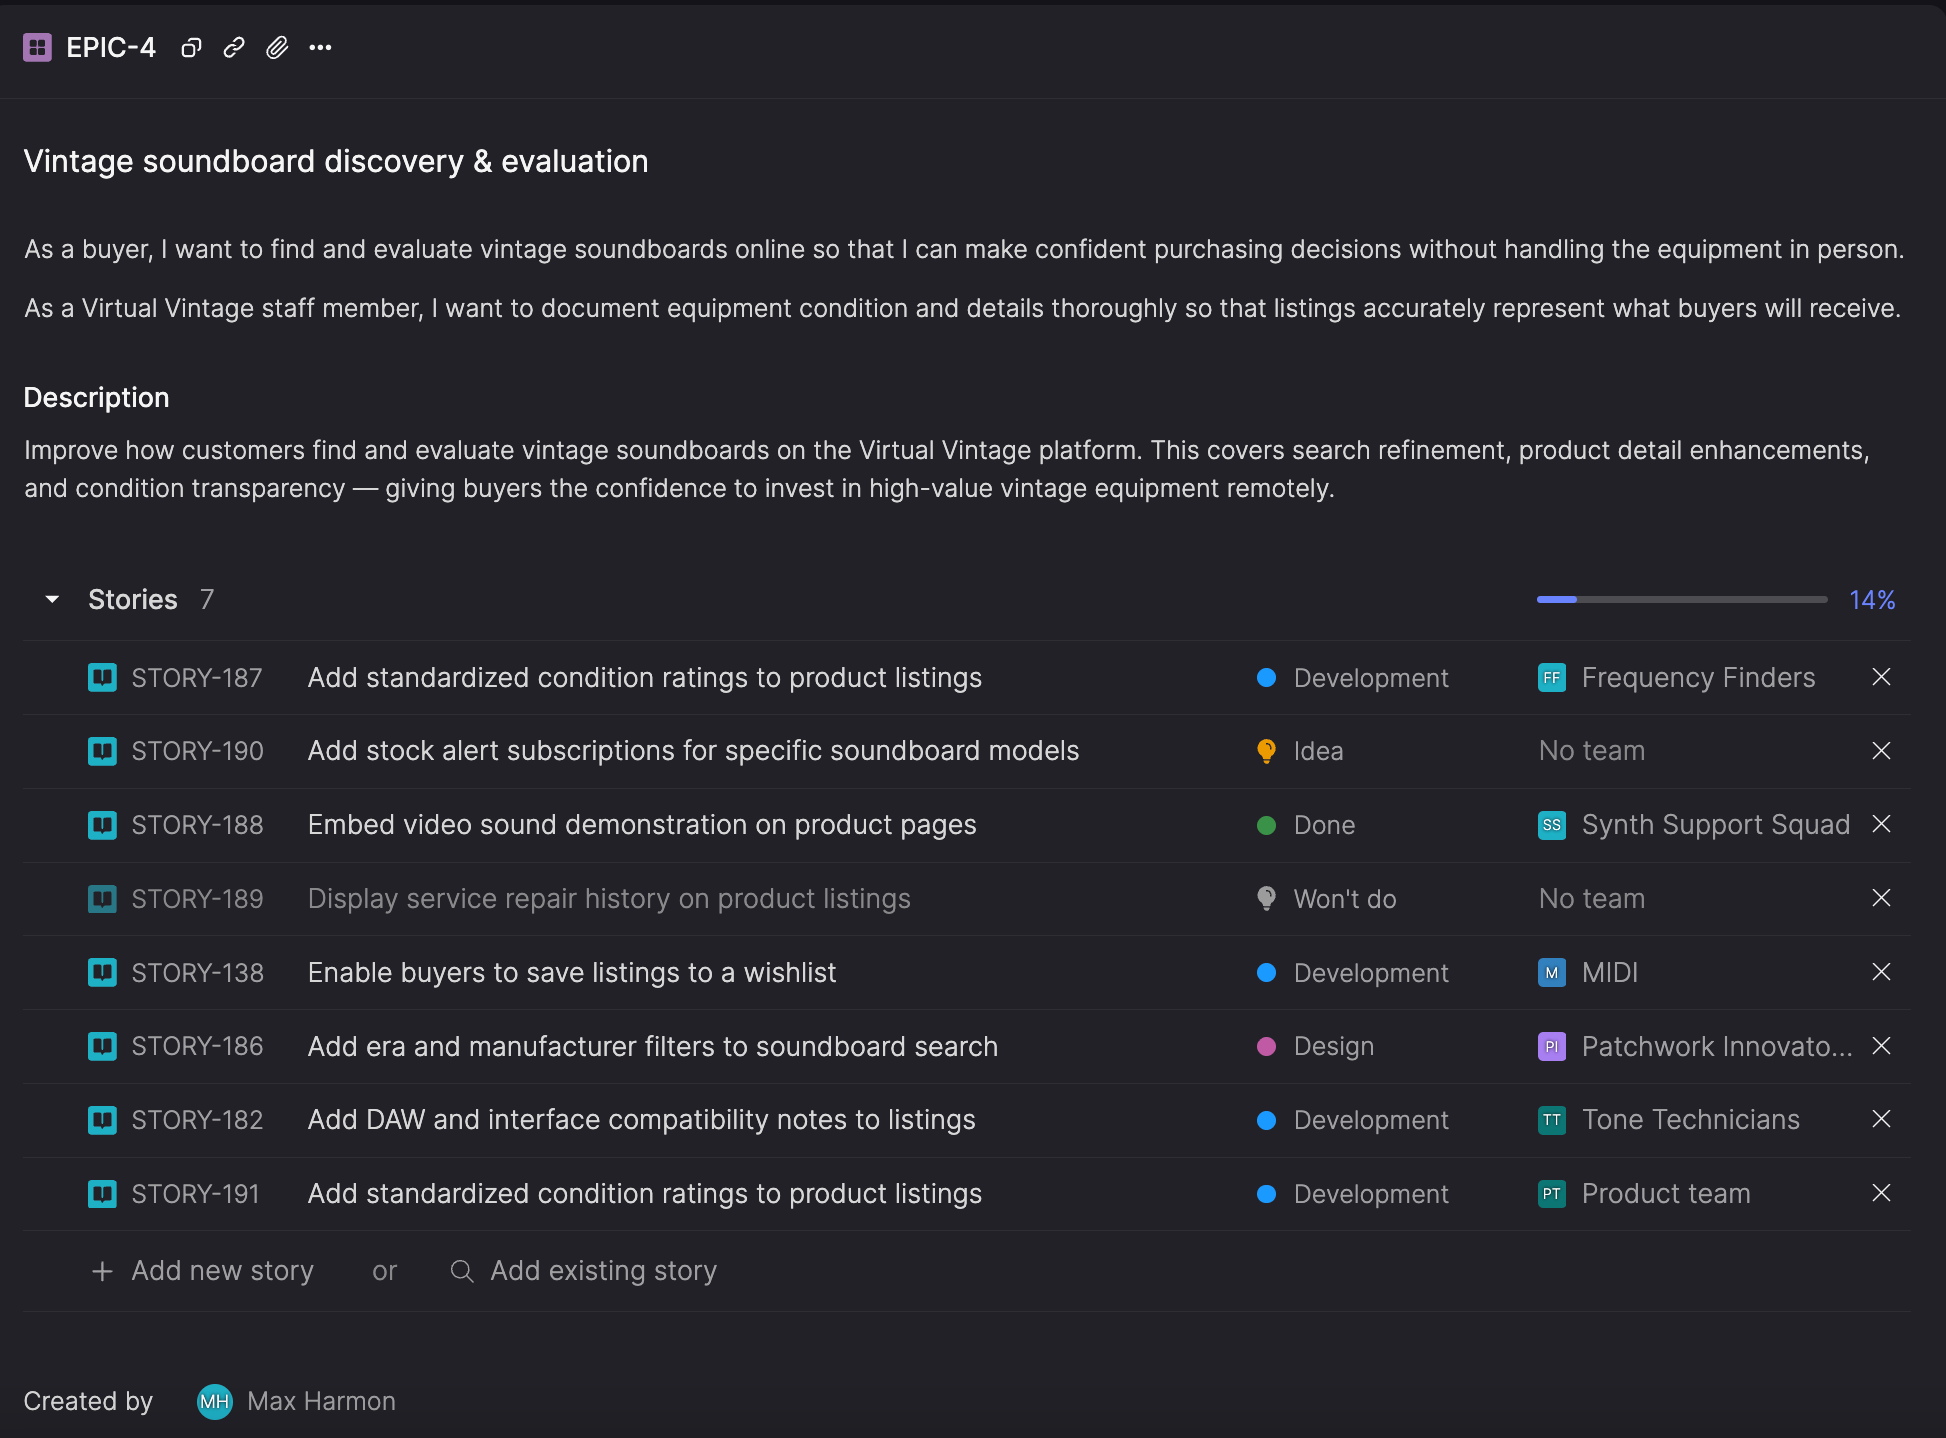
View an epic's progress
Each epic includes a progress bar that shows how many of its stories are complete.
Stories in an epic also show their assigned team and current workflow step. Hover over the step icon to see the step name, which helps you understand how work is progressing across teams.
Stories in the Won't do category are excluded from the progress bar and the story count.
Create an epic
You can create epics when you're planning work or while you're working inside a story.
From the Create new menu:
- In the sidebar, click or hover over Create new.
- From the menu, select Epic.
- In the Create epic dialog, enter a title and optional description.
- Click Create epic.
From a story:
- Open a story.
- In the story details panel, under Epic, click Add to epic.
- Start typing the title of the epic, and then click Create a new epic '
<entered title>'. - In the Create epic dialog, enter a title and optional description.
- Click Create epic.
The epic is created and the story added to it in a single step.
When splitting a story:
When splitting a story, Atono helps you keep related work organized.
- If the story already belongs to an epic, both resulting stories remain in that epic.
- If the story does not belong to an epic, you're prompted to optionally create one for them.
Split stories are not automatically linked beyond sharing an epic.
Add user stories
Epics can include one or more user stories to describe the broader user-facing intent behind the work.
Use the format:
As a [type of user], I want to [action or feature] so that [benefit or reason].
Unlike story-level user stories, which describe what a single story delivers, epic-level user stories describe the higher-level "who, what, and why" across the entire initiative. They help explain the purpose behind the work as a whole, not just the individual pieces.
As you write, Atono suggests previously-used personas and prompts you to complete each part of the user story.
Add multiple user storiesIf an epic supports multiple user needs or perspectives, press Return to add at the end of a user story to add another one.
Add a description
The epic description is a freeform space to document why the epic exists.
Use it to capture goals, user journeys, high-level mockups, or anything else that helps your team understand the scope of the work.
When viewing an epic:
- The description is initially shown in a shortened view to keep the page easy to scan.
- If the description is longer, you can select View full description to open it in a dedicated view for reading and editing.
The description supports the same text formatting and attachments as stories and bugs.
Add and manage stories
Inside an epic, you can create new stories as you define the work or add existing ones that already contribute to the same goal. This makes epics useful both for early planning and for organizing work that’s already underway.
Epics can contain up to 100 stories, and each story can belong to only one epic at a time.
Add new stories
You can quickly sketch out work directly inside an epic by entering story titles as you think of them.
- Open the epic.
- Click + Add new story and start typing a story title.
- Press Return to create the story.
- Continue entering titles to add more.
Each story is created immediately. You can open them later to fill in details.
Add existing stories
If the work already exists, you can add those stories to an epic instead of creating new ones.
From the epic:
- Open the epic.
- In the Add existing story search bar , search for a story.
- Select the story.
From a story:
- Open a story.
- In the story details panel, click Add to epic.
- Do one of the following:
- Search or select an existing epic.
- Create a new epic by entering a title and click + Create a new epic
<entered epic name>.
Epics are ordered by recent activity, so the ones you're actively working in appear first. Activity includes:
- Editing the epic title
- Editing user stories
- Updating the description
- Adding or removing stories
Remove stories from an epic
You can remove a story from an epic at any time without affecting the story itself.
From the epic:
- Open the epic.
- Hover over the story and click the X.
From the story:
- Open the story.
- In the story details panel, click the current epic.
- Click No epic.
Order stories within an epic
You can reorder stories within an epic to reflect how the work fits together. For example, you might arrange stories based on priority, sequence, or dependencies between them.
- Hover over the story you want to move.
- When the drag handle appears, click and drag the story to a new position in the list.
Delete an epic
If an epic is no longer needed, you can delete it from the epic detail view.
- Open the epic.
- Click the ellipsis (...) icon.
- Select Delete epic.
- In the confirmation dialog, click Delete to confirm, or click X to cancel.
Deleting an epic removes the grouping but does not delete the associated stories.
Stories remain in their team backlog and continue moving through their workflows independently.